The Password Manager KeePassXC
The Password Manager KeePassXC

Instructions
Password managers are programmes that manage user names and passwords. Password managers use encryption and a complex master password to keep passwords safe. They work in a similar way to a notebook that is locked in a safe and can only be accessed with the corresponding code. The advantage is obvious: instead of many different passwords, only one needs to be remembered.
Installing KeePassXC and setting up a new database
- Call up the ZenWorks agent (Windows Explorer > This PC).
- Open the Campus Software folder. (Alternatively, you can also download the software at https://keepassxc.org/ if you cannot use ZenWorks).
- Start the installation of KeePassXC by double-clicking on the icon. KeePassXC is automatically installed and opened on your computer.
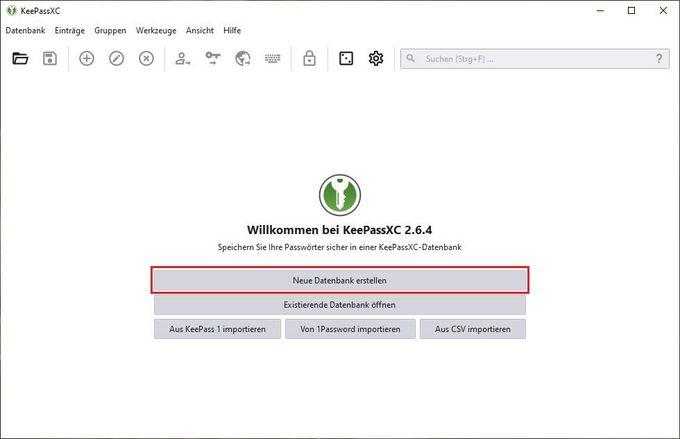
- Click on Create new database in the start window. The "General information about the database" window opens:
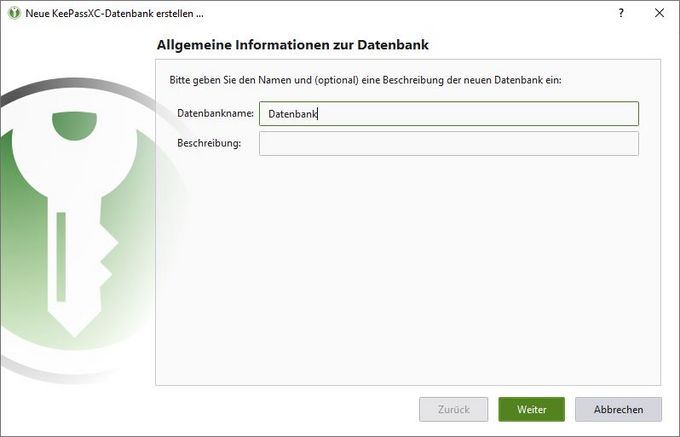
- Enter a name for the database in the Database name field. Optionally, you can add a description in the Description field.
- Click on Next. The "Encryption settings" window opens. Important: All settings made here can also be made or changed later in the database settings. You can keep the default settings or increase the decryption time to 2.0 s, for example, to increase security. The database format and the settings under Advanced settings are already optimised for most cases and should only be changed in exceptional cases.
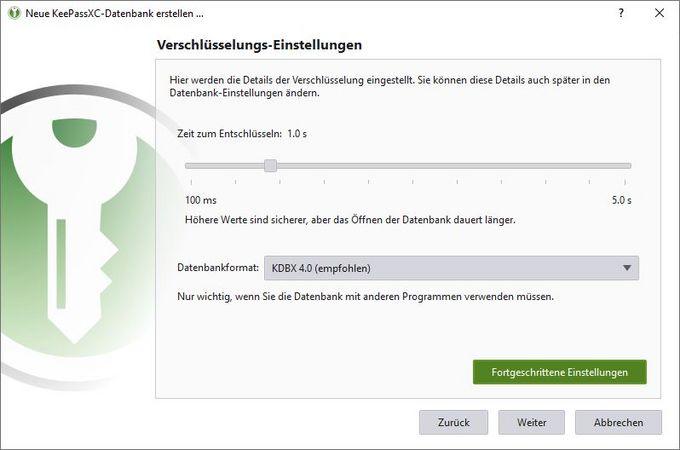
- Click on Next. The "Database credentials" window opens.
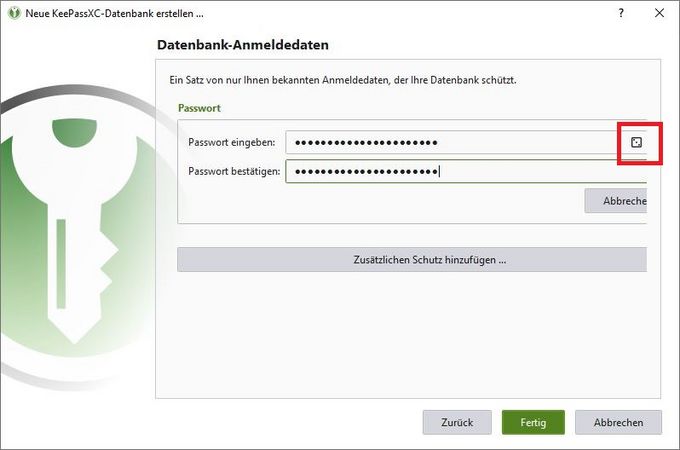
- Enter a password in the Enter password field and repeat the entry in the Confirm password field. You can use a password generator to create your password via the symbol highlighted in red at the end of the input line. If you want to increase the protection of your database, click on the Add additional protection button. You have the following options here:
- Add key file: For additional security, you can add a key file with random data. You must keep this secret and never lose it, otherwise you will lose access to the database.
- Add challenge-response: If you have a YubiKey or OnlyKey, you can use it to increase security. To do this, one of its slots must be programmed as an HMAC-SHA1 challenge response.
- Click Done to finalise the database setup.
Explanation of the programme interface
The menu and toolbar are located at the top of the application start window, with the following areas below:
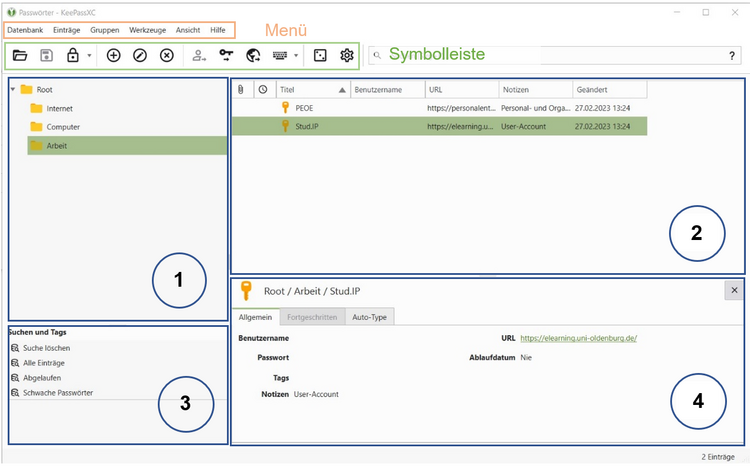
- Groups: Entries and groups can be located below the main entry. For the sake of clarity, it is advisable to organise entries in groups. You can create new groups via the Groups menu item. Groups can also be created within groups. Settings from higher-level groups are inherited by the levels below.
- Entries: An entry is created for each website or application for which the login data is to be saved in KeepassXC. The view shows all entries in the selected group. Each column can be resized, reorganised and shown or hidden as required. Right-click on the header to see all available options. Create new entries: see the following section.
- Search and tags: You can filter the view of entries by selecting the desired setting.
- Preview: Displays a preview of the selected group or entry. The preview can be temporarily hidden using the close button on the right-hand side or completely deactivated in the application settings.
Create and use a new entry
- You have several options for creating a new entry:
- Menu: Select the menu item Entries, then New entry
- Toolbar: Click on the "+" symbol
- Keyboard: Press Ctrl + N
- Enter all the required data and click OK to create the entry.
- To use the entry to log in to a website or application, proceed as follows:
- Call up the website or application, either via the link in the preview, the
- Click in the Username (or similar) field of the website/application.
- Switch to KeePassXC and copy the user name to the clipboard using the
- Switch back to the login of the website/application and paste the user name from the clipboard.
- Repeat the last steps for the password (icon
- Log in to the website/application.
- Call up the website or application, either via the link in the preview, the
Open existing database
You can use KeepassXC to open and use databases in kdbx format that you have created with Keepass2. Open the KeepassXC application. Click on the Open existing database button.
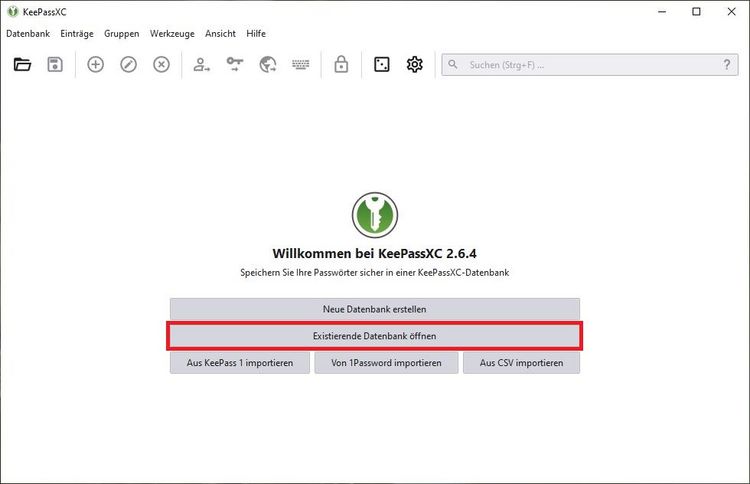
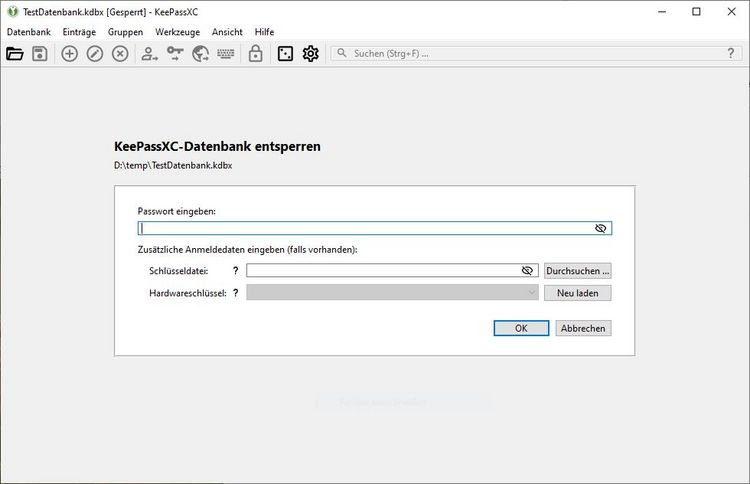
Once you have selected the database file in the file open dialogue, you can enter the password for the database in the following window and unlock your database.
