Connecting Mac OS X to a university email account
Connecting Mac OS X to a university email account
Below is a step-by-step guide to setting up Apple Mail.
Please note: Students of the University of Oldenburg can only to set up this function after having agreed to use the calendar.For more information, please see Aktivierung der Synchronisation von Stud.IP in den Groupware-Kalender von Exchange (Activating Stud.IP synchronisation with the Exchange Calendar).
Step 1 – Launch Apple Mail
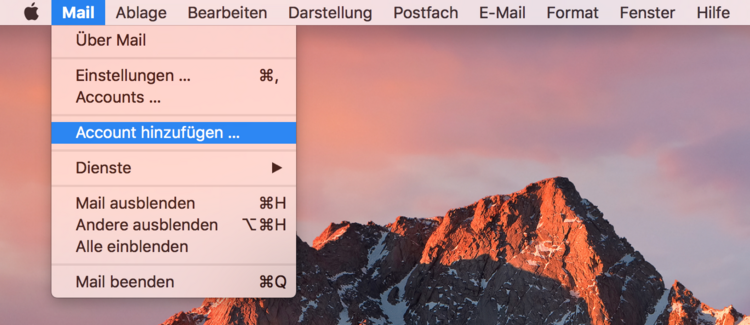
Start by opening Apple Mail and then access the settings via Mail -> Settings. Then switch to the Accounts tab

Step 3 – Enter your name and password

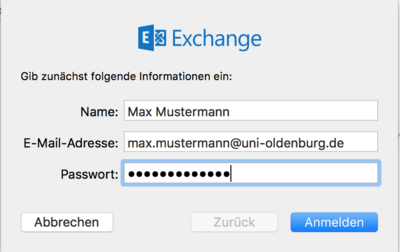
Enter your first and last name, your email address and the password for your university account. Click on Sign in.
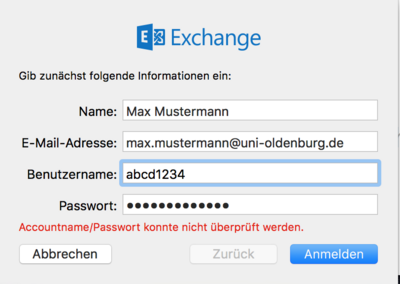
The error message ‘Account name/password could not be verified’ will appear. You will also see that an additional input field has appeared; here you need to enter your user name. (The user name is your user ID, i.e. abcd1234)
Once you have entered all the required data, click on sign in again.
Step 4– Select features you want to synchronise
In the last window you can select which data you want to synchronise with the Exchange Server.
If you only want to retrieve your emails, check the box next to Mails.
You can also synchronise Contacts, Calendar data, Reminders, and Notes (tasks) from Outlook on the web by checking the respective items.


