VPN client for Mac OS X
VPN client for Mac OS X
Download VPN client
Download the VPN client Global Protect for Mac OS X from the software portal using your personal ID.
Log in to the Software Portal with your user account and password.


Install VPN client
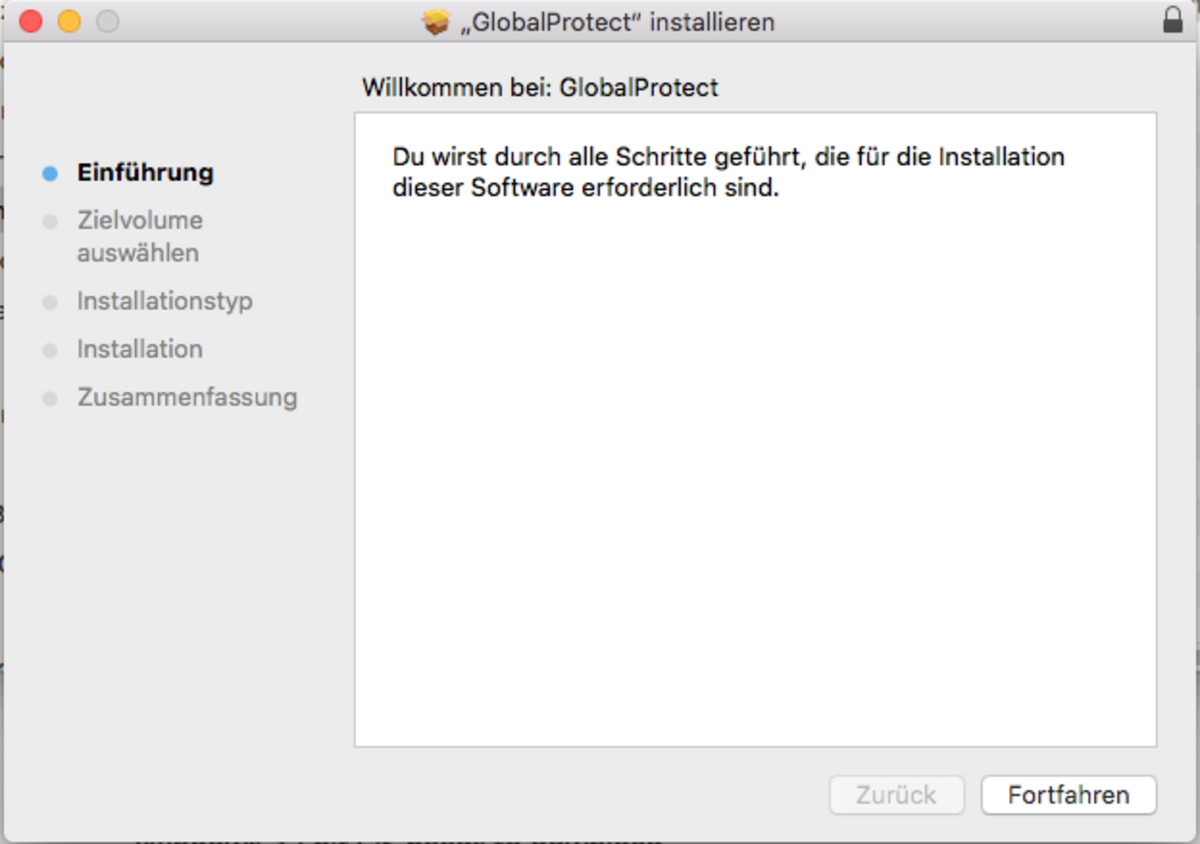
After a successful download, start the installation by executing the downloaded installation programme.
To do this, click on Continue.
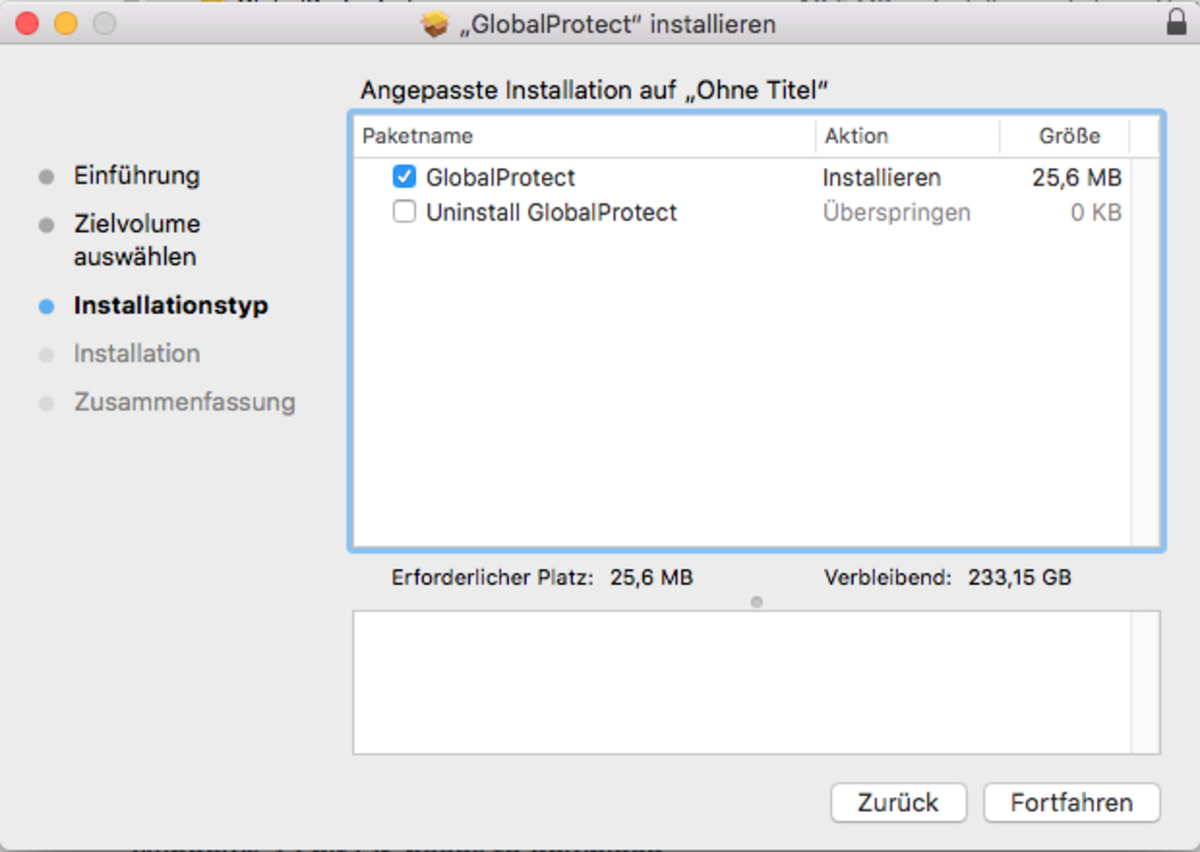
Make sure that the installation of the Global Protect Client is selected in the following dialogue.
Click on Continue.
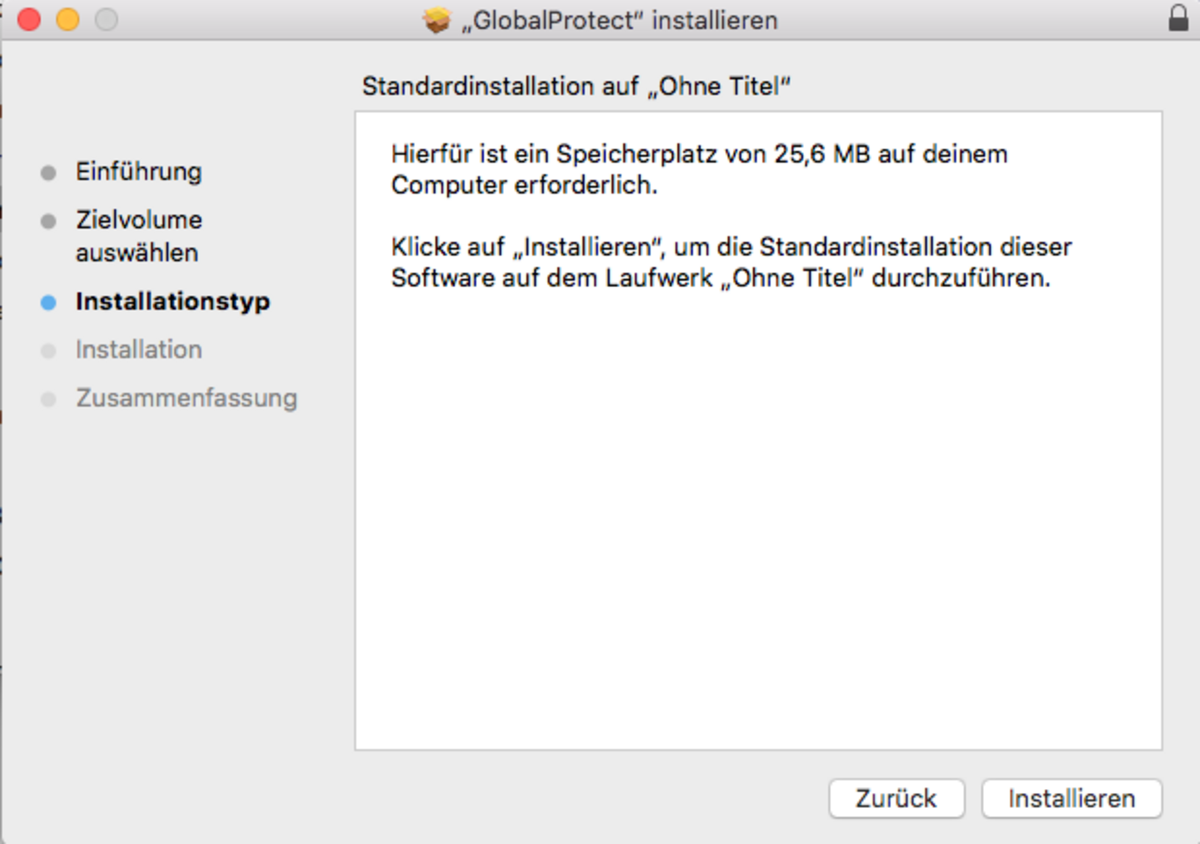
Make sure that you have enough free space on your device.
Click on Install to start the installation.
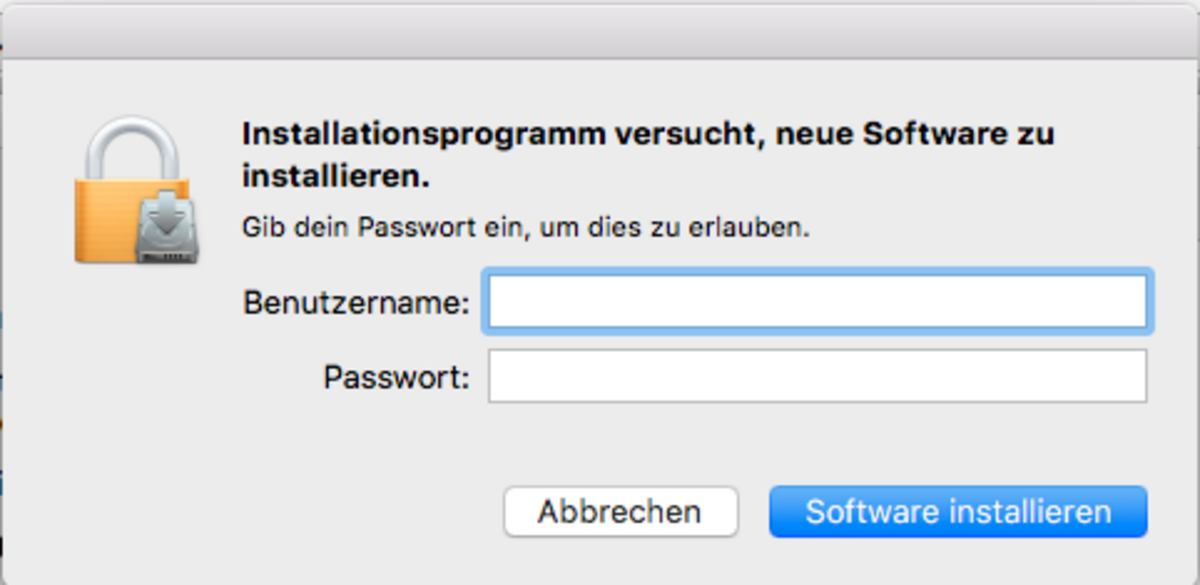
Allow the installation by entering your user name and password on your terminal:
Click on Install software to start the installation.
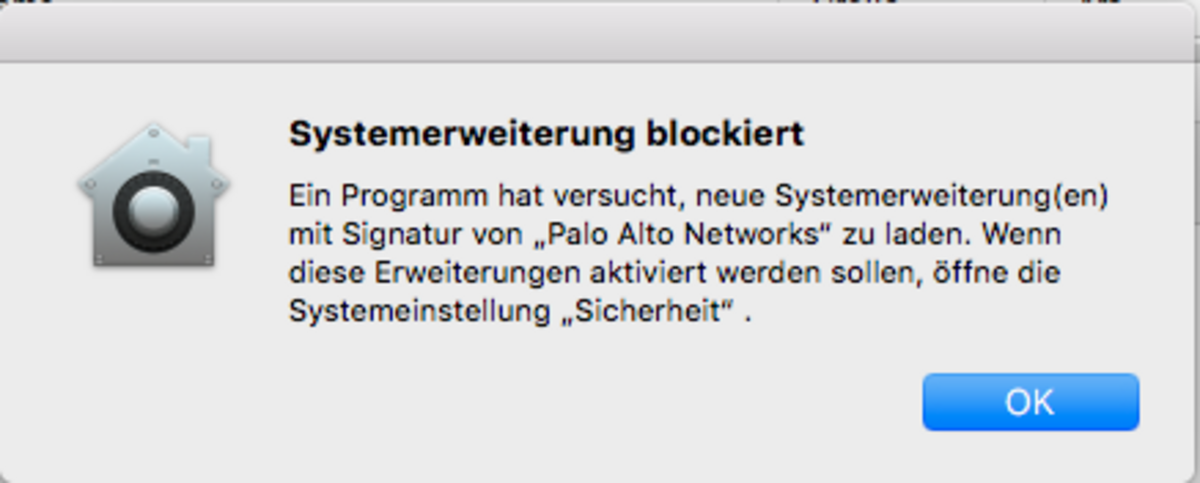
Allow the Global Protect VPN client to load system extensions.
Click OK to do this.
Following the installation, the security settings of your end device are adjusted to receive software updates for the VPN client.
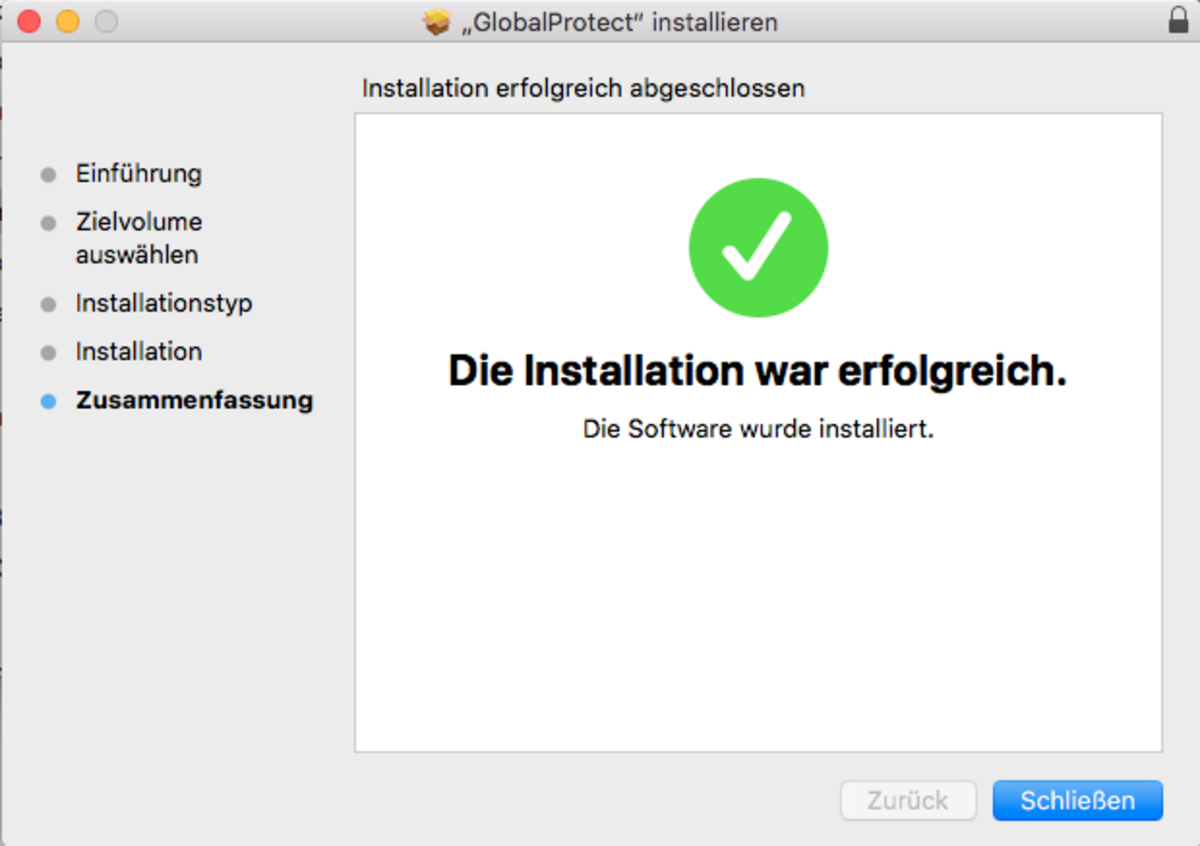
The installation programme confirms a successful installation:
Click Close to complete the installation.

Adjust security settings for the VPN client
To receive software updates for the Global Protect VPN client, you must allow the loading of system software from the developer of the VPN client.
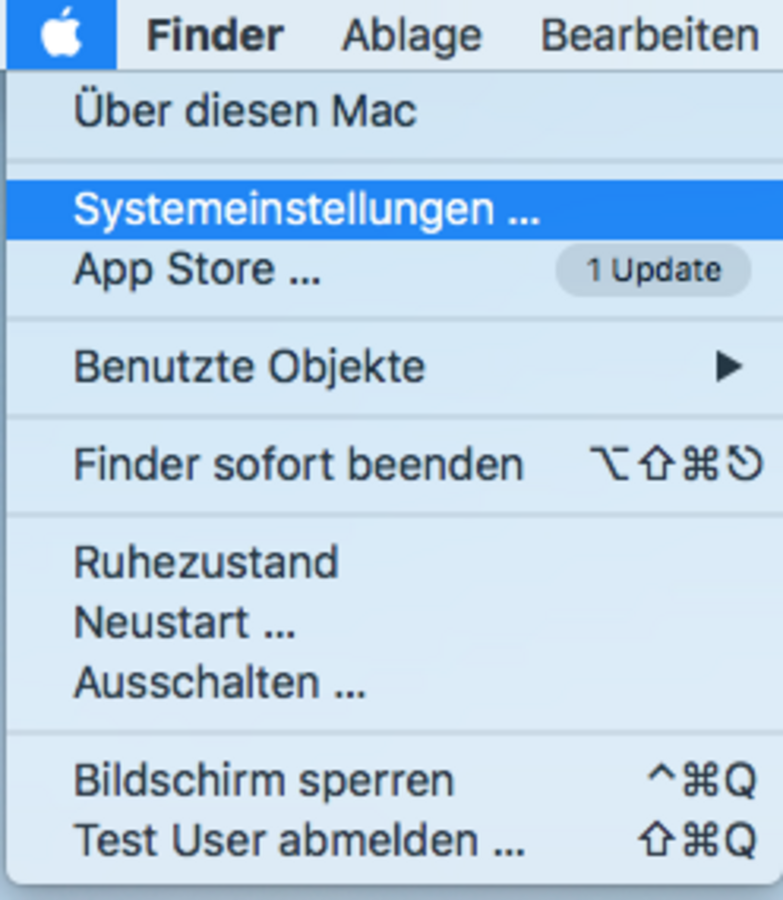
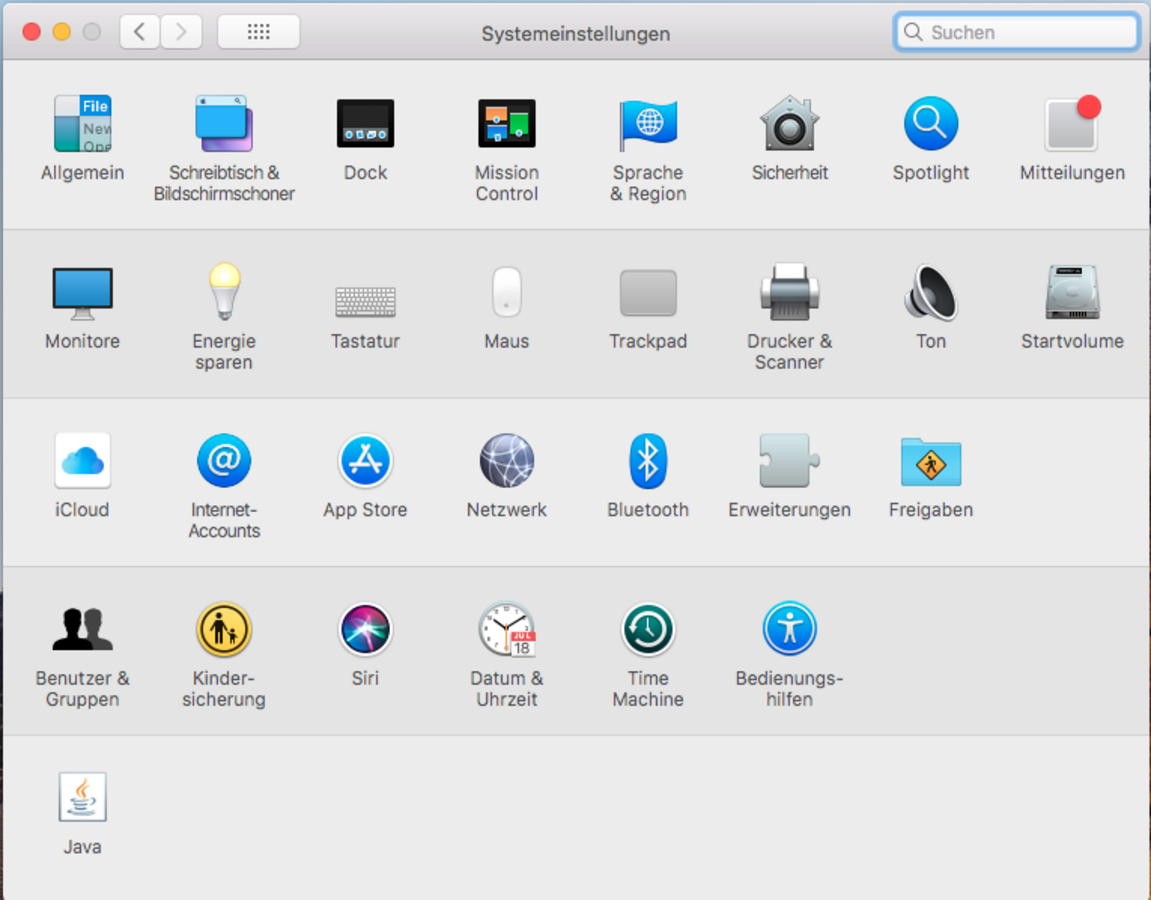
In the system settings of your terminal device, call up the item Security  .
.

In the following dialogue, allow software updates by "Palo Alto Networks":
To do this, click on Allow.
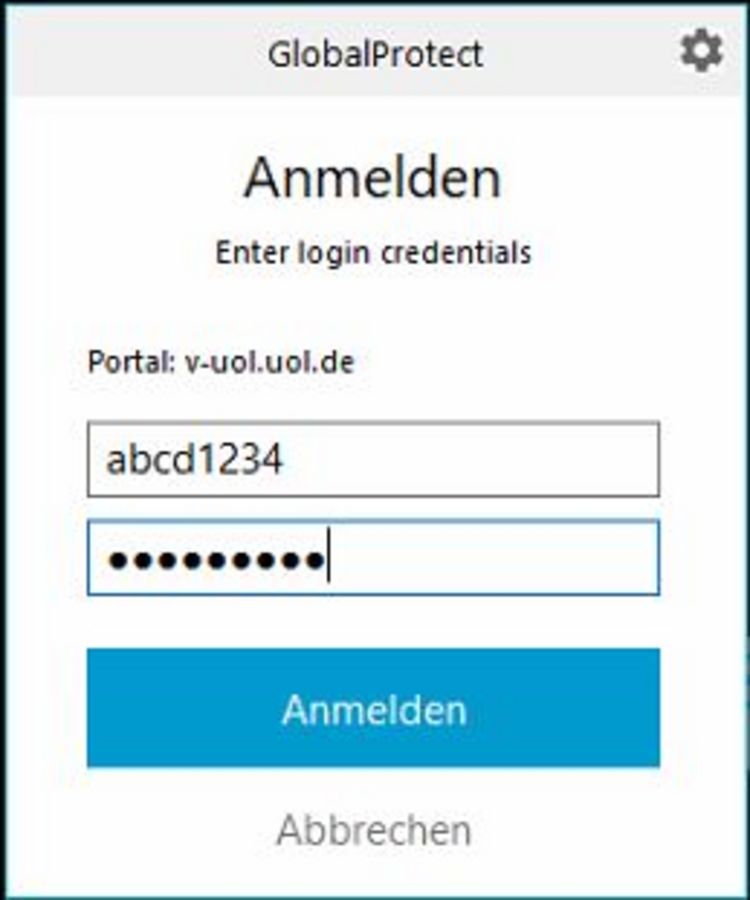
Configure VPN client
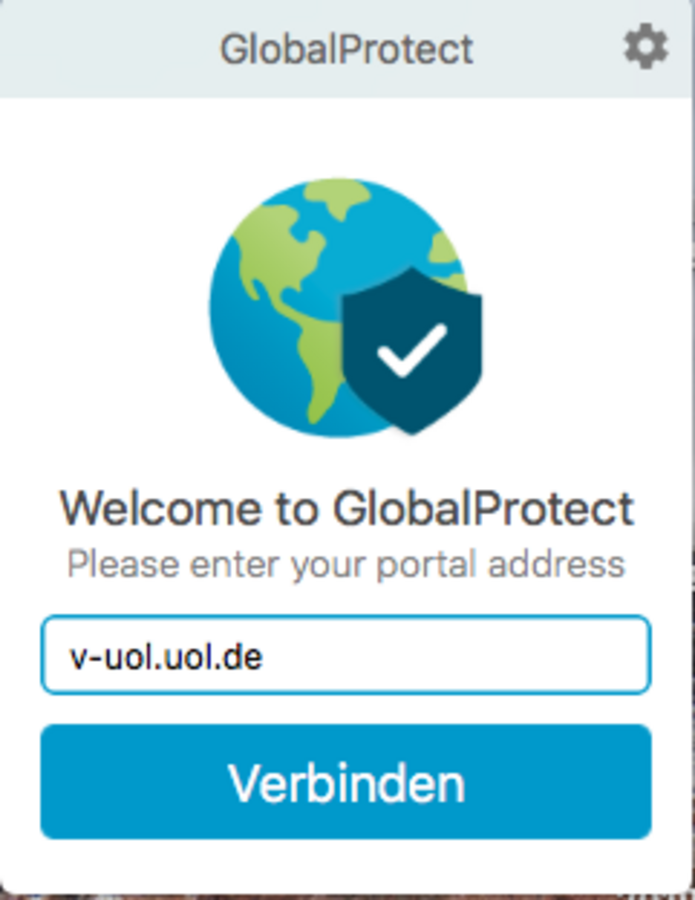
After completing the installation, the Global Protect VPN client starts automatically.
Enter v-uol.uol.de as the portal address and click Connect.
The portal address is saved in the VPN client and does not need to be entered again.