Home drive: Personal data storage
Home drive: Personal data storage
The IT services automatically provide each user account with a 100 GB home drive (also known as the L drive) when it is set up. You can connect this home drive to your end device using the CIFS/SMB and NFS protocols.
Data security
IT services back up your stored data against possible loss due to a disaster by automatically mirroring it to another location.
In the event of accidental deletion or damage to a file, you also have access to automatically created daily backups of the home drive that go back 30 days. You can find instructions on how to view these backups yourself and restore lost data in the section Restoring deleted files from a home drive.
Establishing a connection to a home drive
In order to successfully connect to your home drive, you must be connected to the university network. Please note the information on accessing the campus network.
Windows 11
Step 1: Open the file explorer (shortcut: Win + E) and click on "This PC" in the favourites bar on the left.
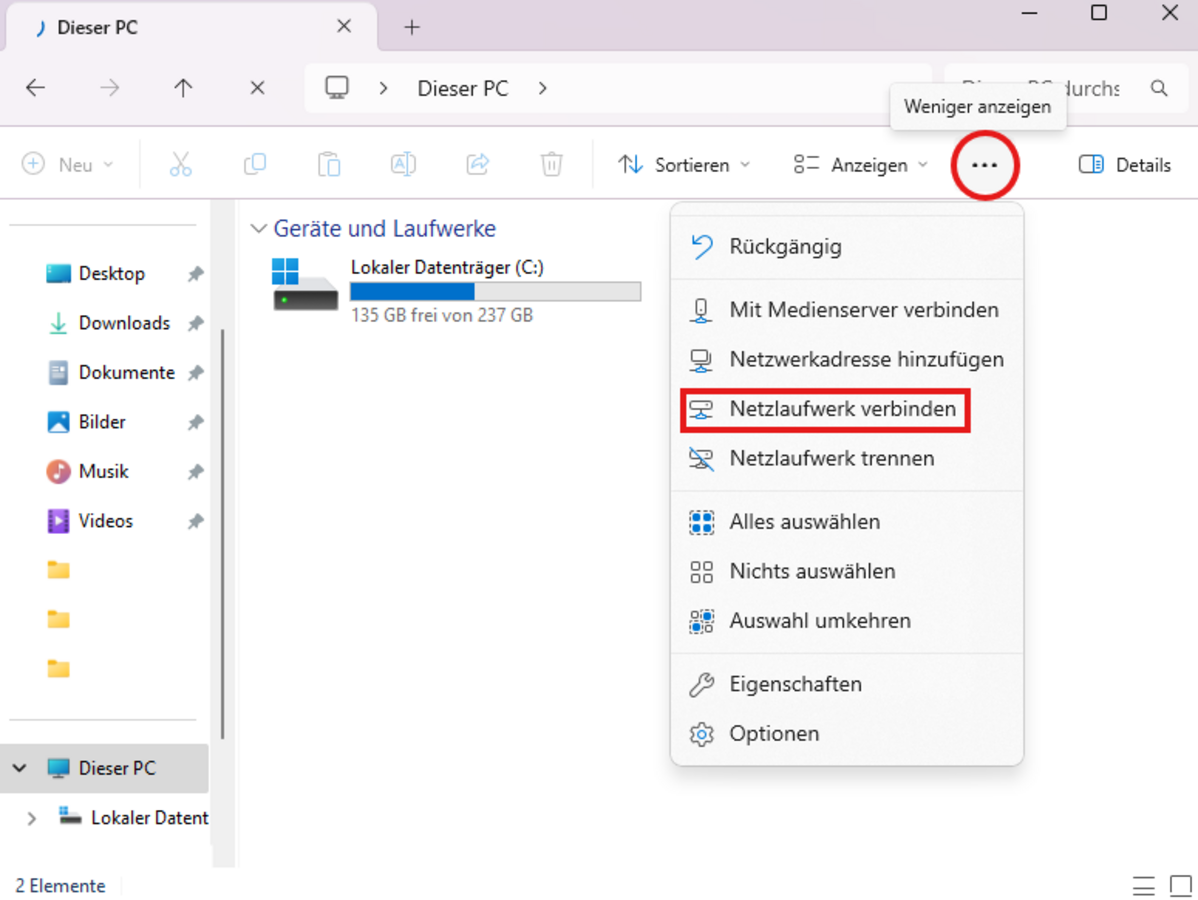
Step 2: Click on the button with the three dots in the menu (see marking in the following figure) and select "Connect network drive".
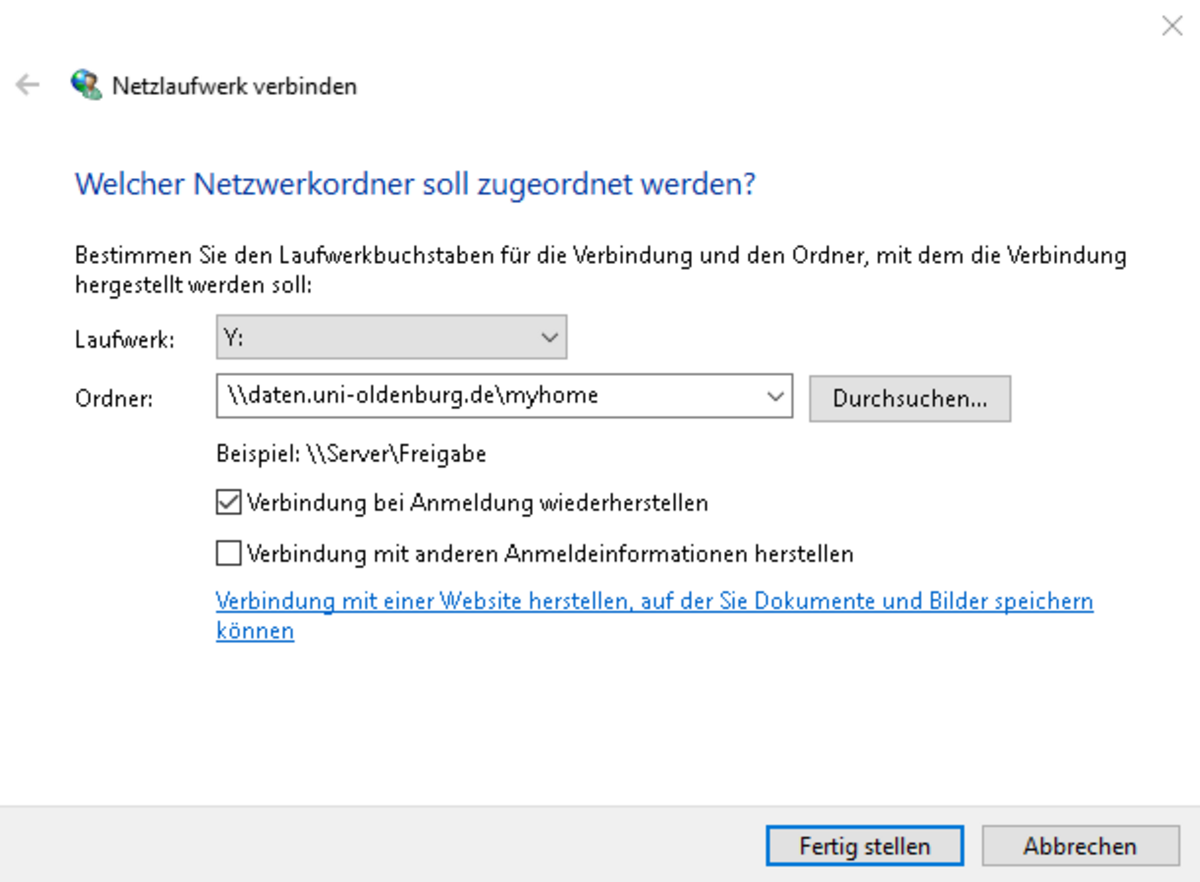
Step 3: In the "Connect network drive" dialogue window that now opens, select a free letter of your choice (e.g. Z:) or leave the selection as it is. In the field next to "Folder:" enter \\daten.uni-oldenburg.de\myhome and then click on "Finish" (see following figure). Ticking the box to restore the connection when logging in requires that your system knows the access data.
macOS
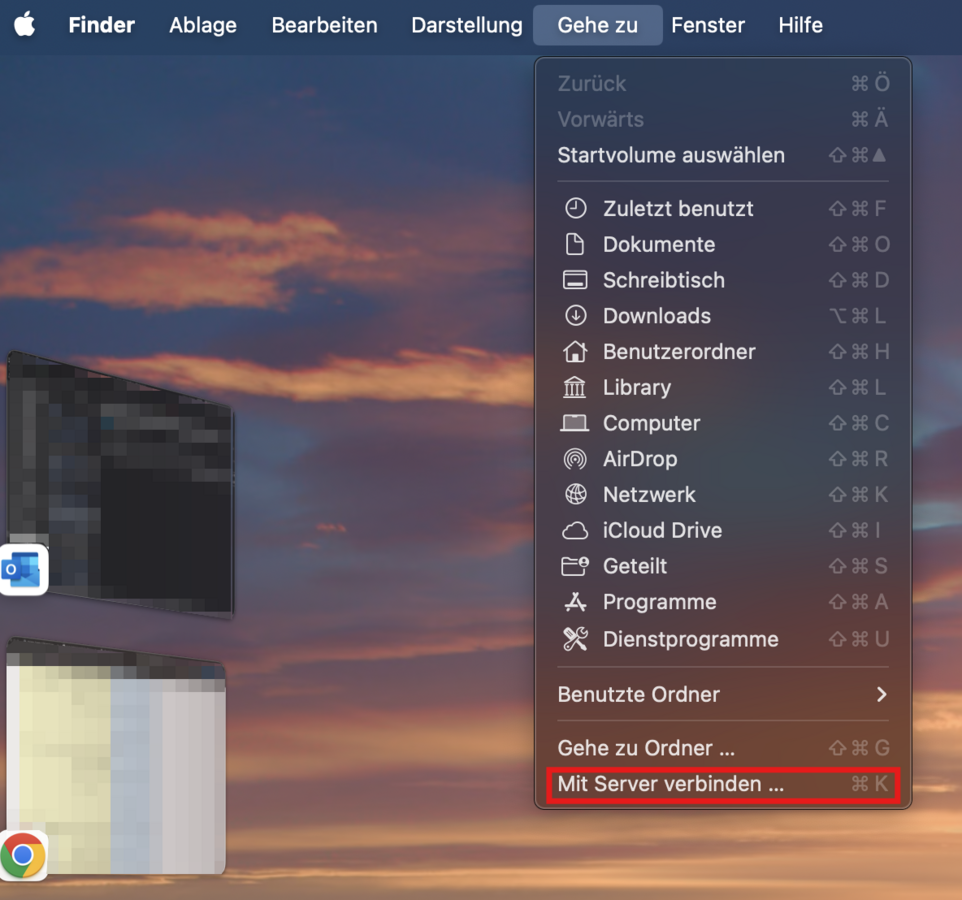
Step 1: Switch to the "Finder menu" (recognisable by the word "Finder" next to the Apple symbol) and open the menu item "Go to". Then click on "Connect to server..." (see following illustration).
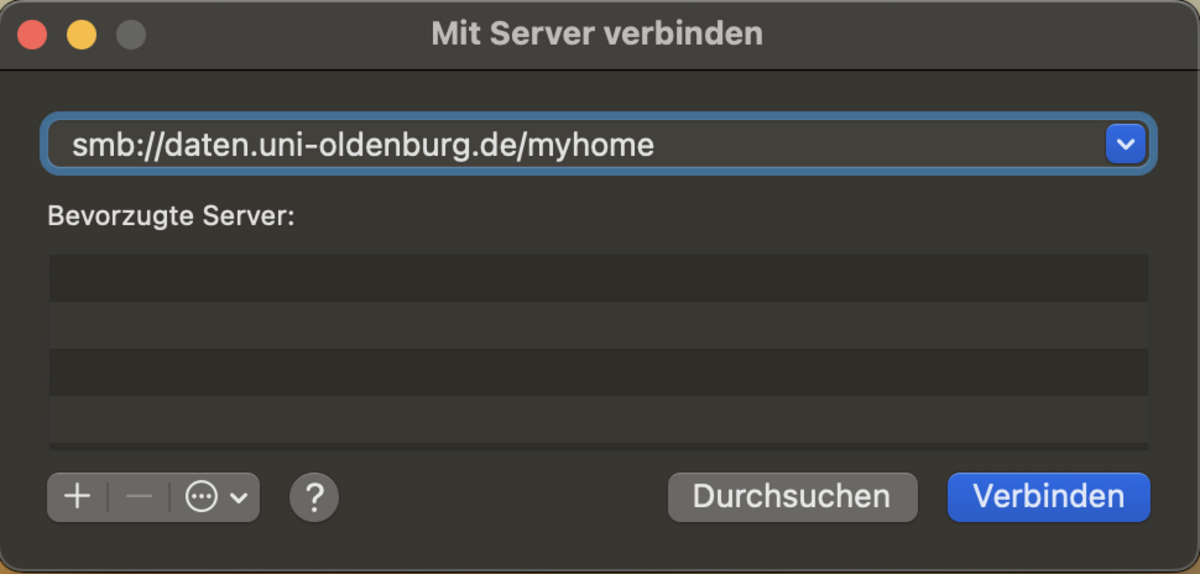
Step 2: In the dialogue window that now opens (see following figure), enter smb://daten.uni-oldenburg.de/myhome and then click on "Connect".
iOS and iPadOS
iPadOS
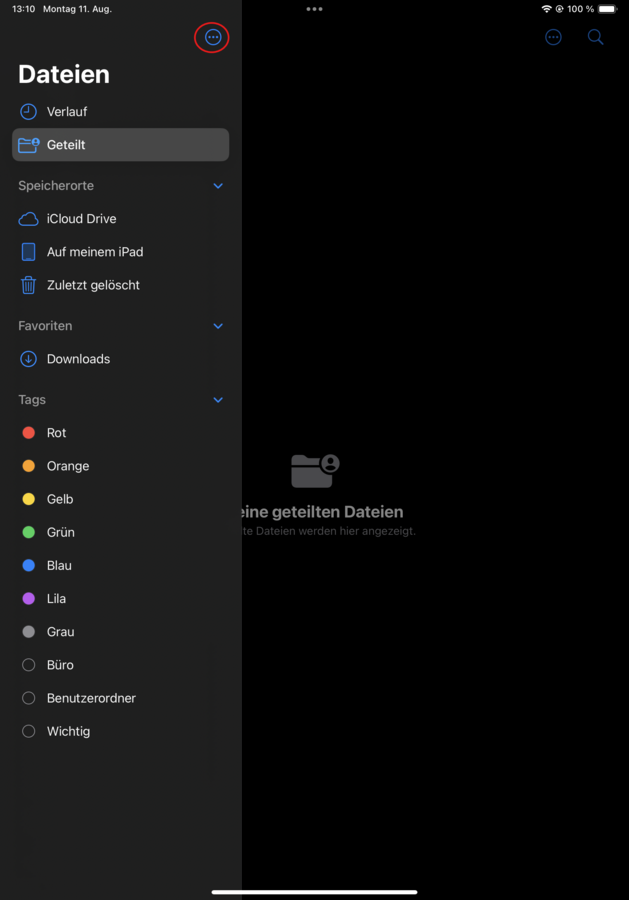
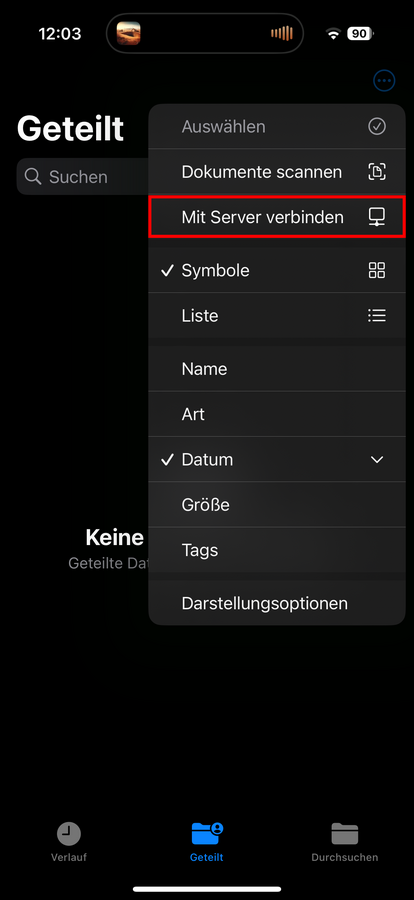
Step 1: Switch to the Files app and click on the button to display the menu on the left-hand side (see marking in the following illustration).
Step 2: In the menu that now opens, press the button with the three dots (see marking). Another menu should open in which you click on "Connect to server".
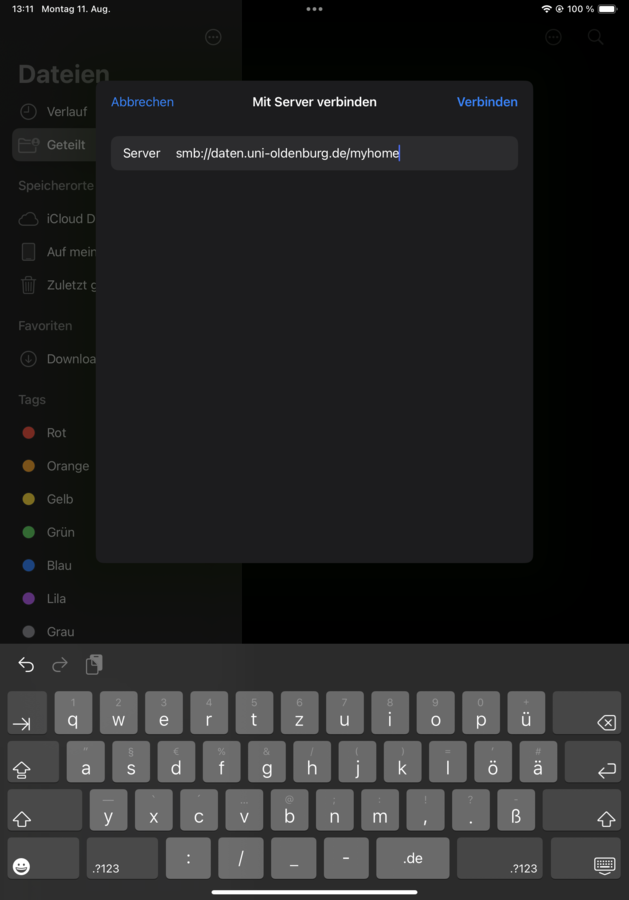
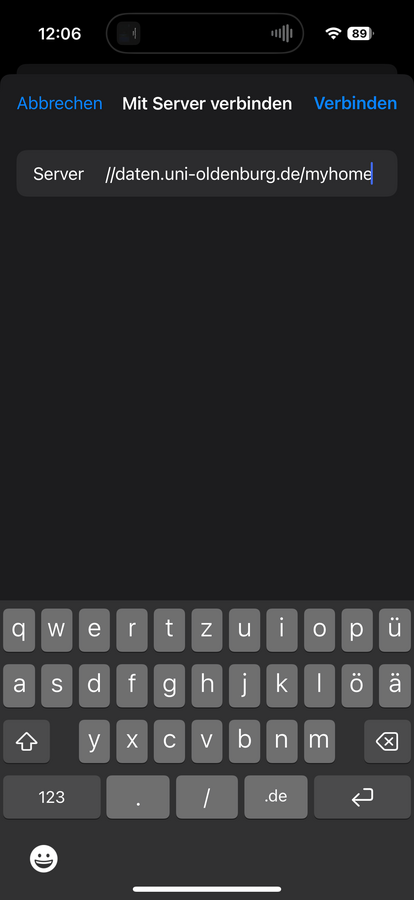
Step 3: In the "Connect to server" dialogue window that now opens, enter smb://daten.uni-oldenburg.de/myhome for Server and click on Connect.
iOS
Step 3: In the open "Connect to server" dialogue window, enter smb://daten.uni-oldenburg.de/myhome in the "Server" field and click on Connect.
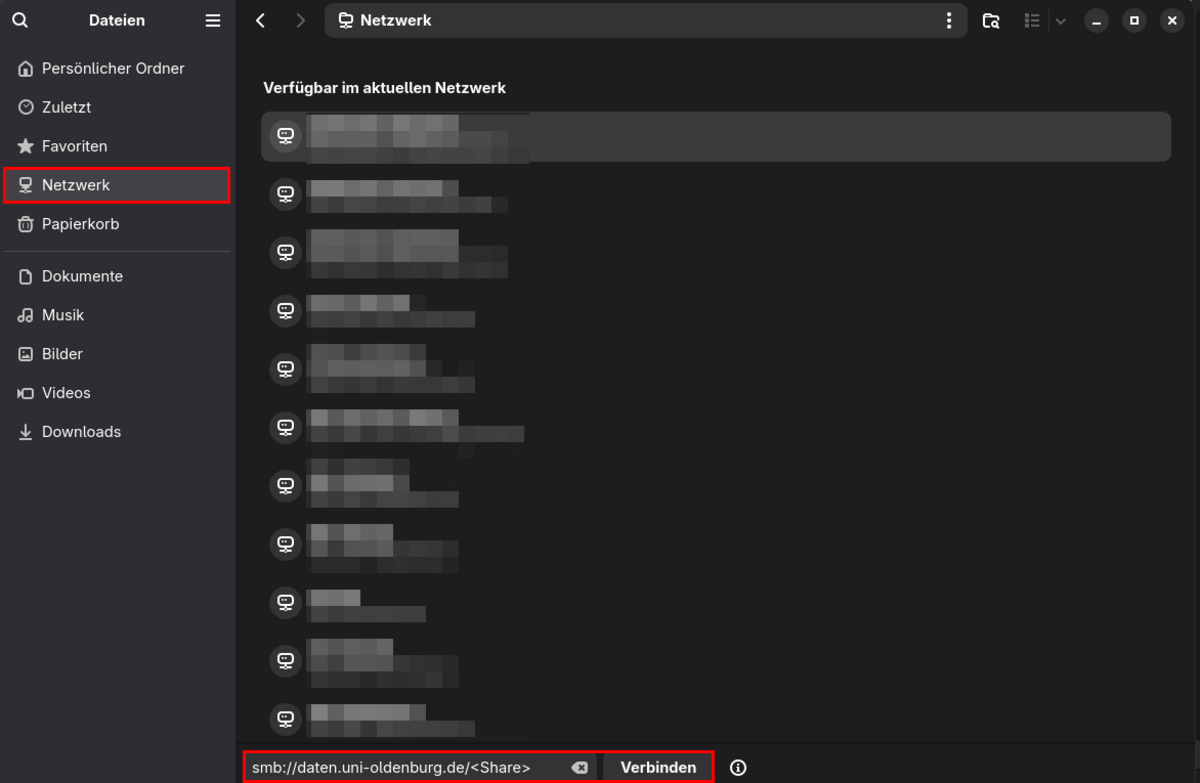
Linux (Fedora 42)
Step 2: Now enter smb://daten.uni-oldenburg.de/myhome in the lower area (see lower red marker in the following figure) and then click on "Connect"
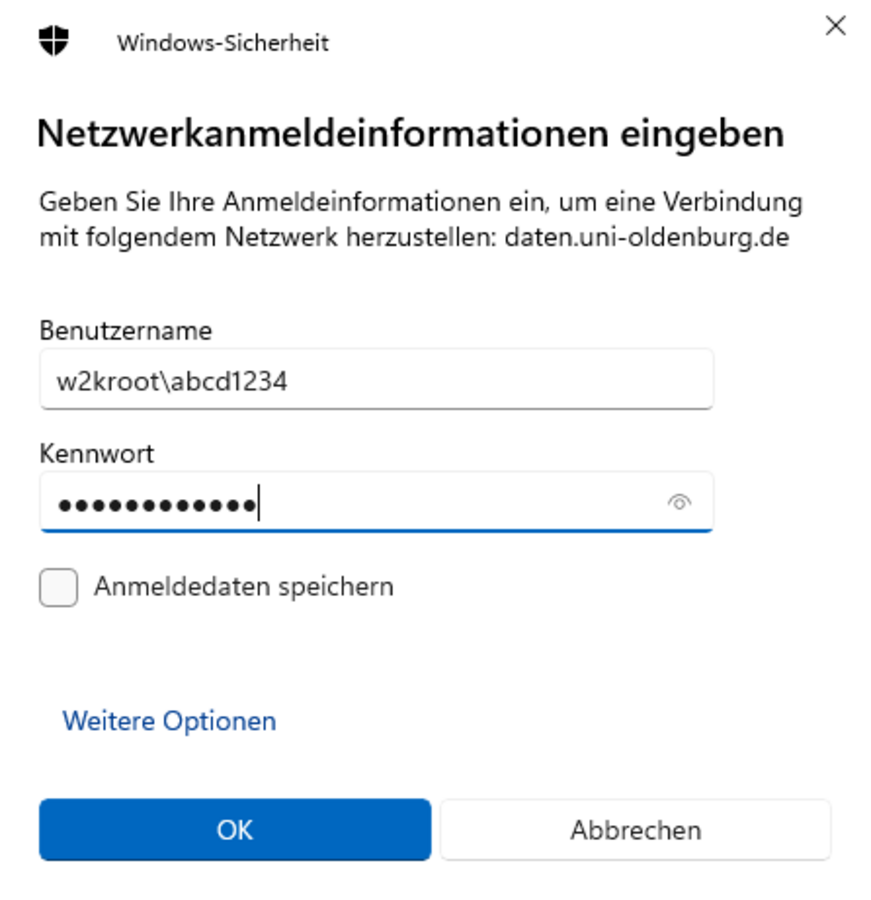
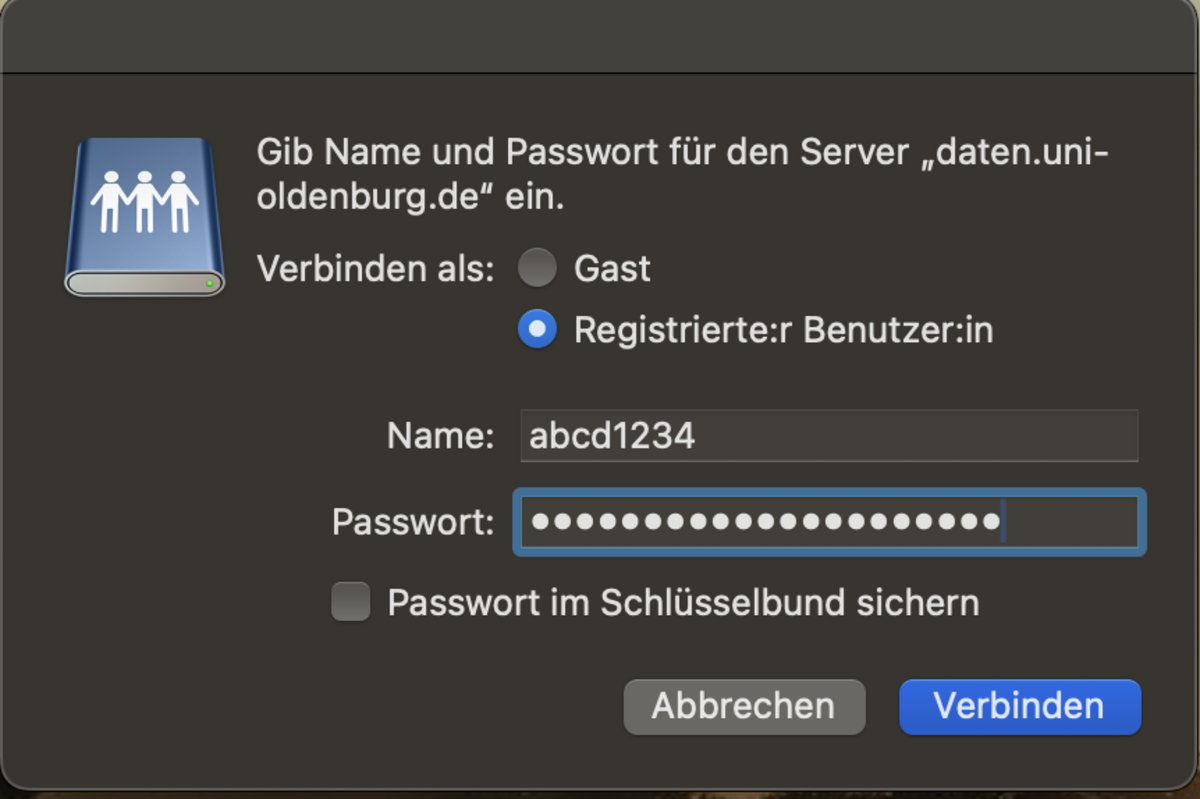
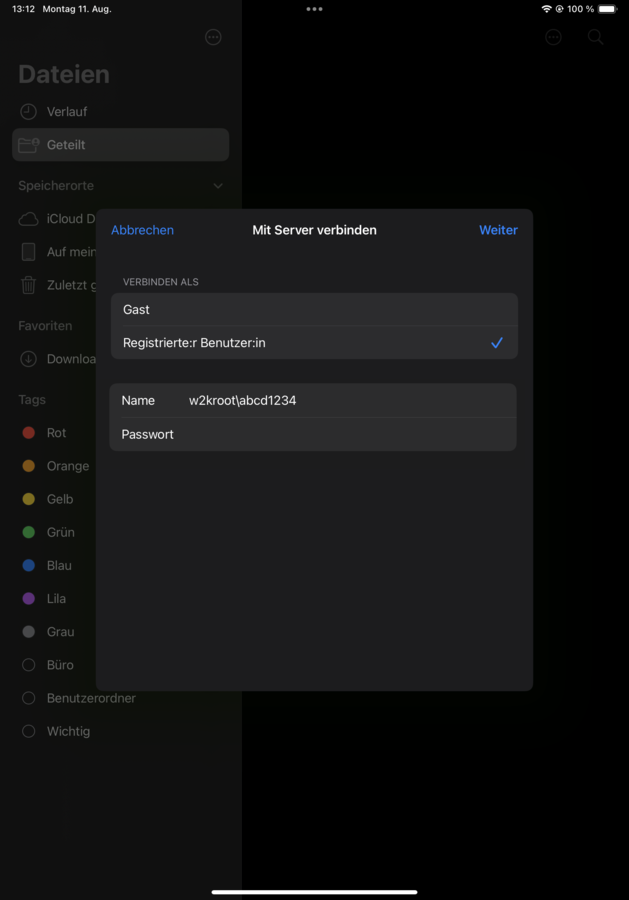
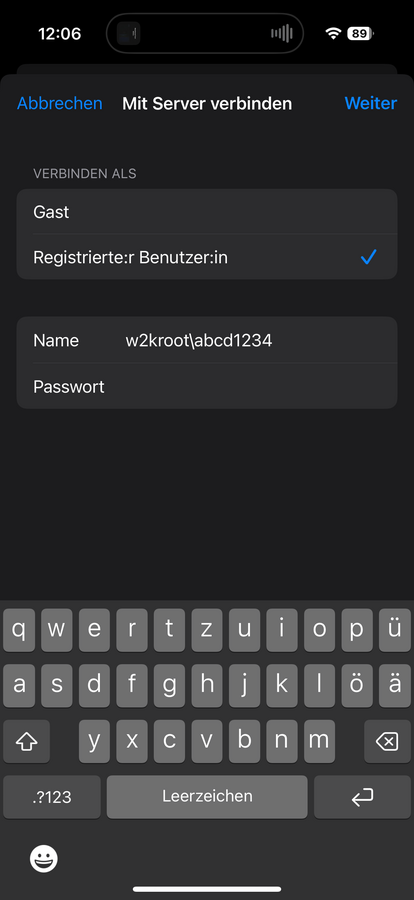
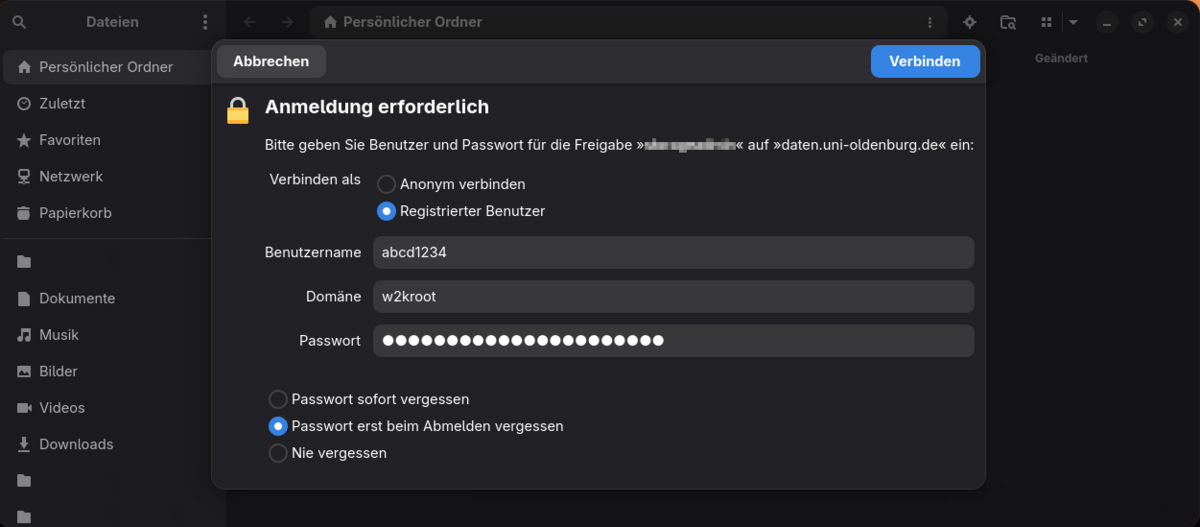
Step 3: If the access data for the home drive is not yet known to your system, a dialogue window for entering this data is displayed (see following illustration). Enter your abbreviation (e.g. abcd1234) as the user name and w2kroot as the domain. Then confirm with "Connect".
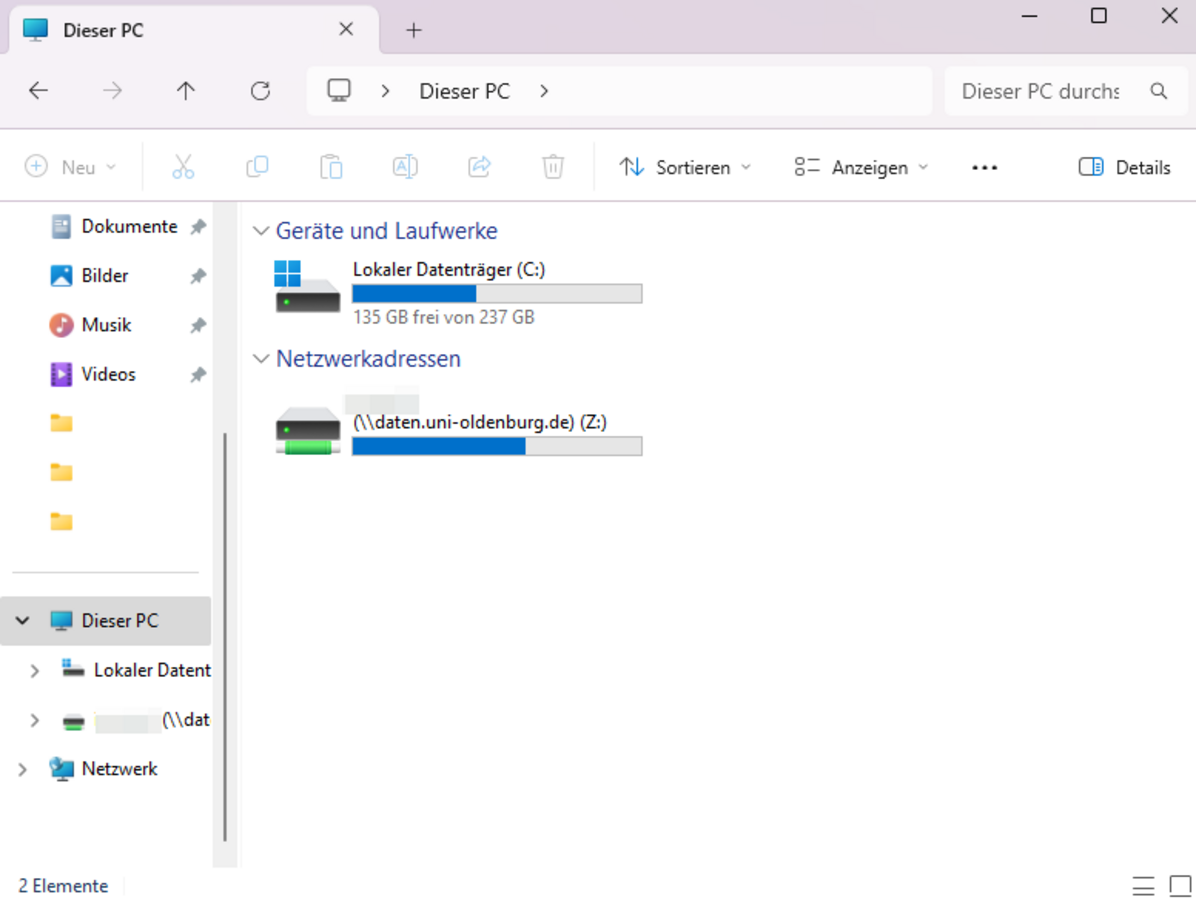
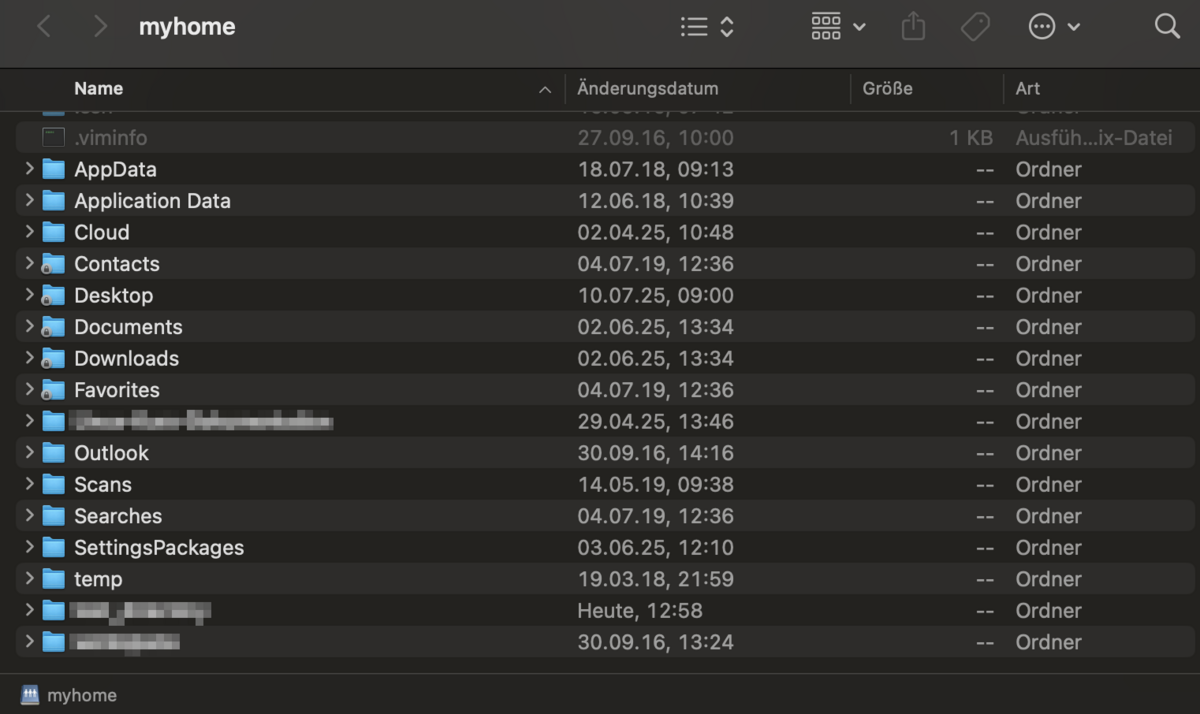
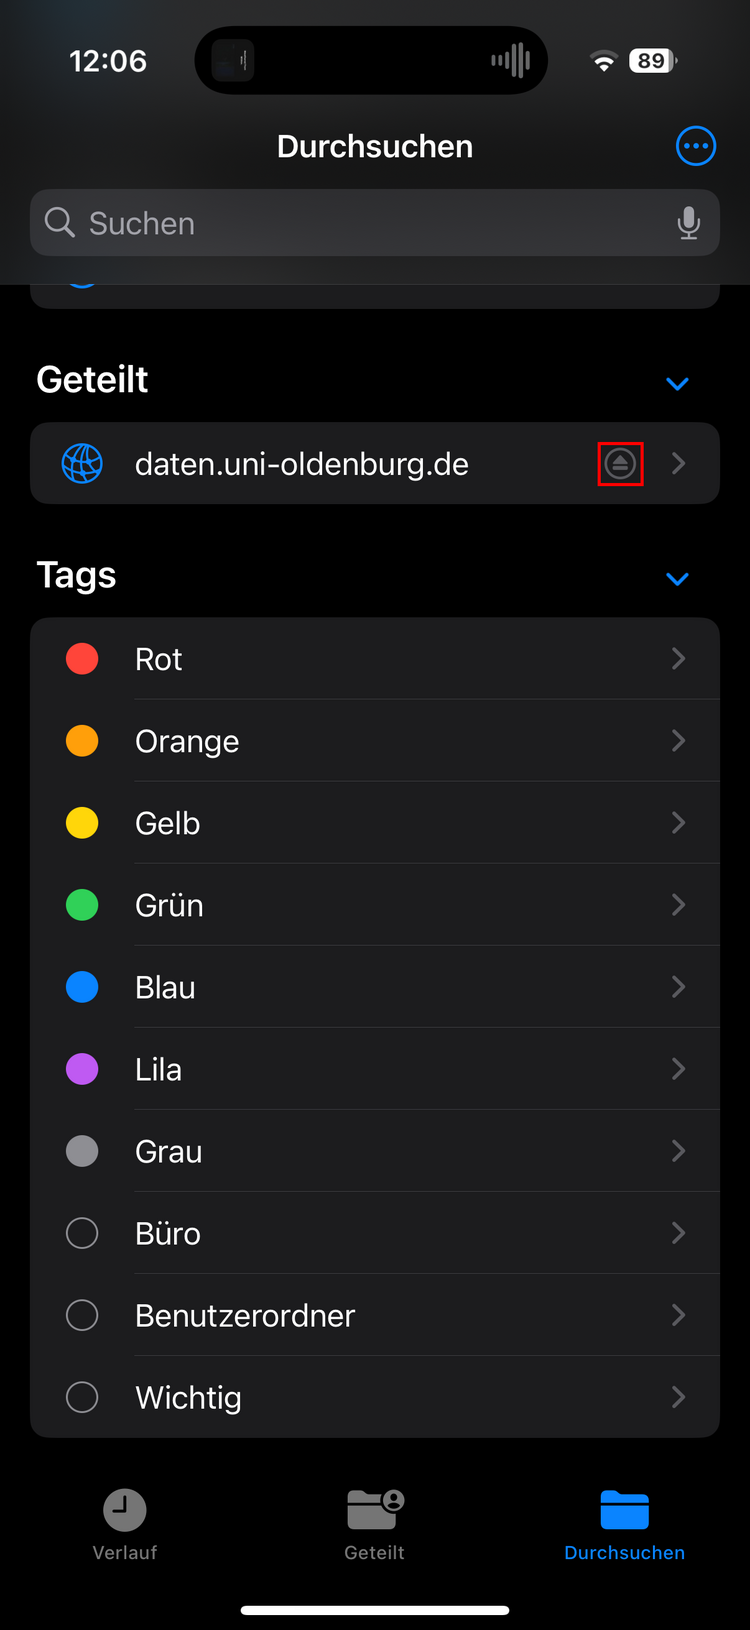
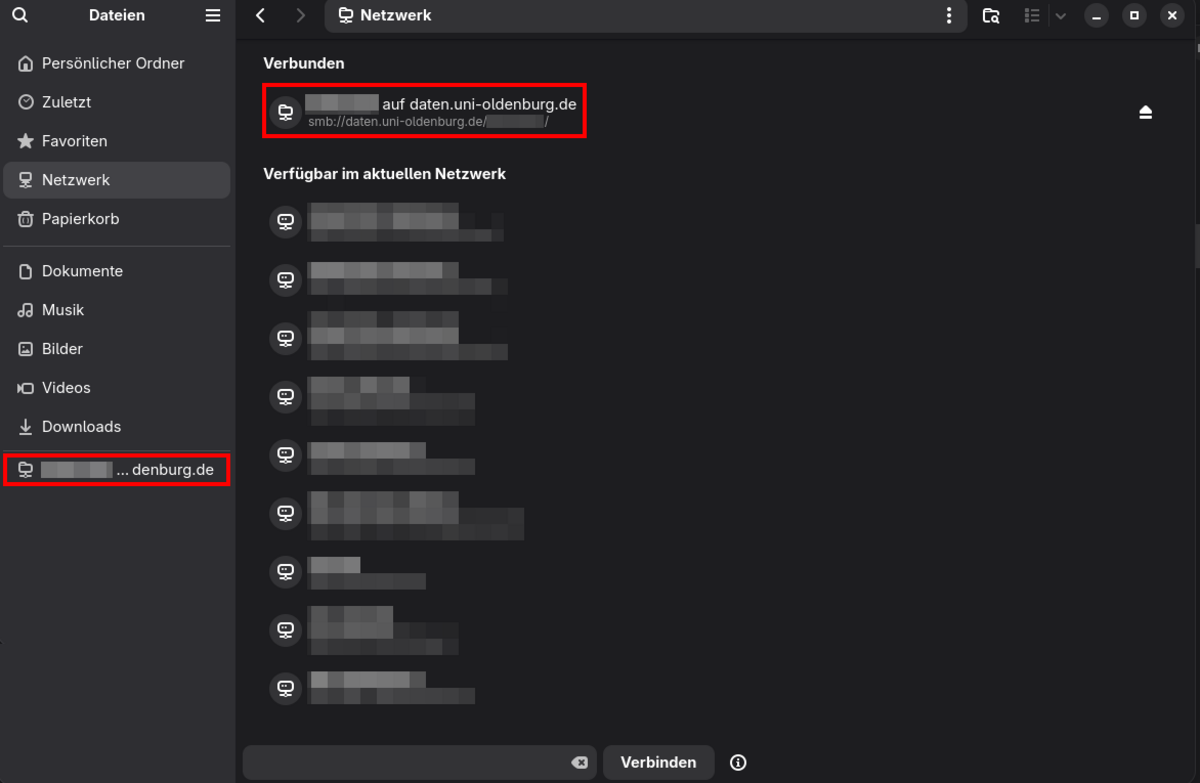
Step 4: You should then be able to find the home drive as Connected in the file explorer under "Network" or in the favourites list (see markings in the following illustration).
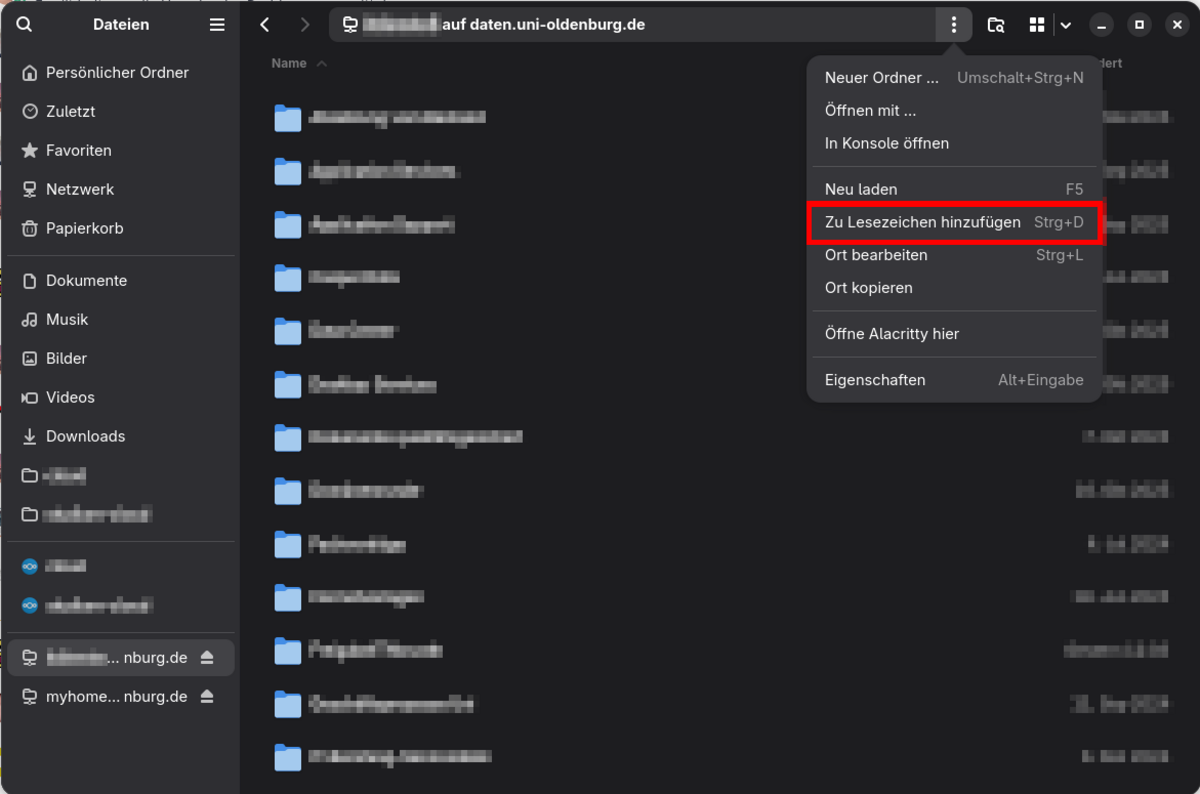
Step 5: To add the home drive or a folder contained in it to the favourites of your file explorer, open it and click on the button with the three dots next to the currently open path (see following figure).
In the menu that now opens, you can add the currently open path to your favourites by clicking on "Add to bookmarks".
Alternatively via cloud storage
To integrate the home drive on an end device, you can use the existing integration into the cloud storage, which does not require an active connection of your end device to the university network. Instructions for setting up a corresponding application can be found here for desktop computers and here for smartphones and tablets.
Restore deleted files from a home drive
Please note the additional information on backing up data contained in the data security section.
If you have any uncertainties or questions, please contact the IT Service Desk or, if available, the decentralised IT manager responsible for you.
Windows 11
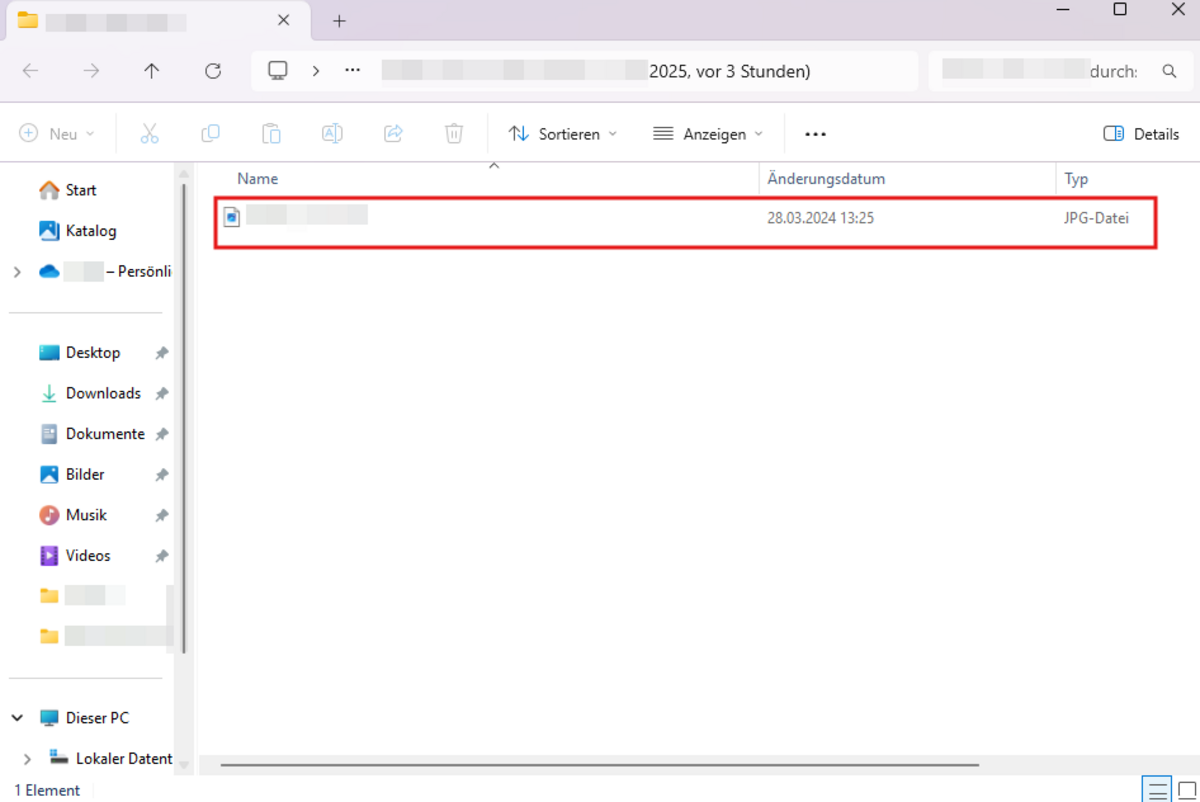
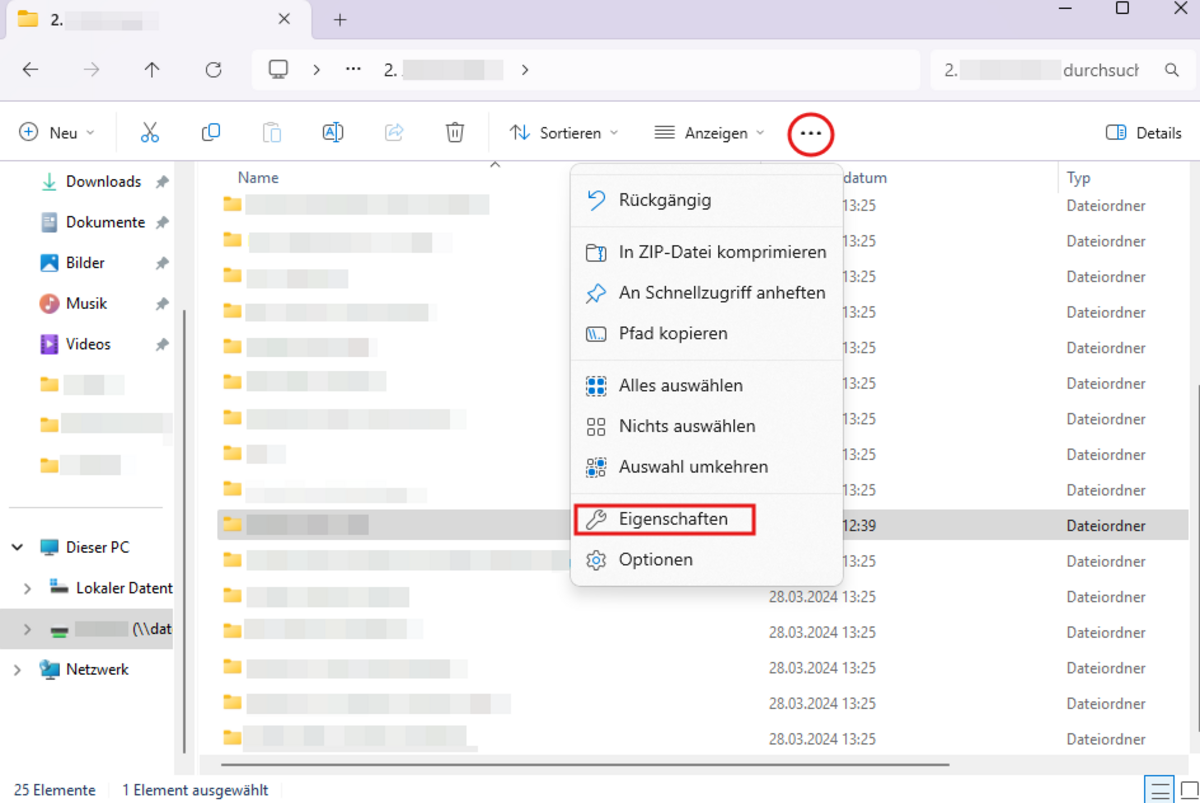
Step 1: Open the home drive and the corresponding folder in the file explorer where you have noticed a file loss. Then click on the menu item with three dots, as shown in the following illustration. In the selection that then opens, you must select "Properties".
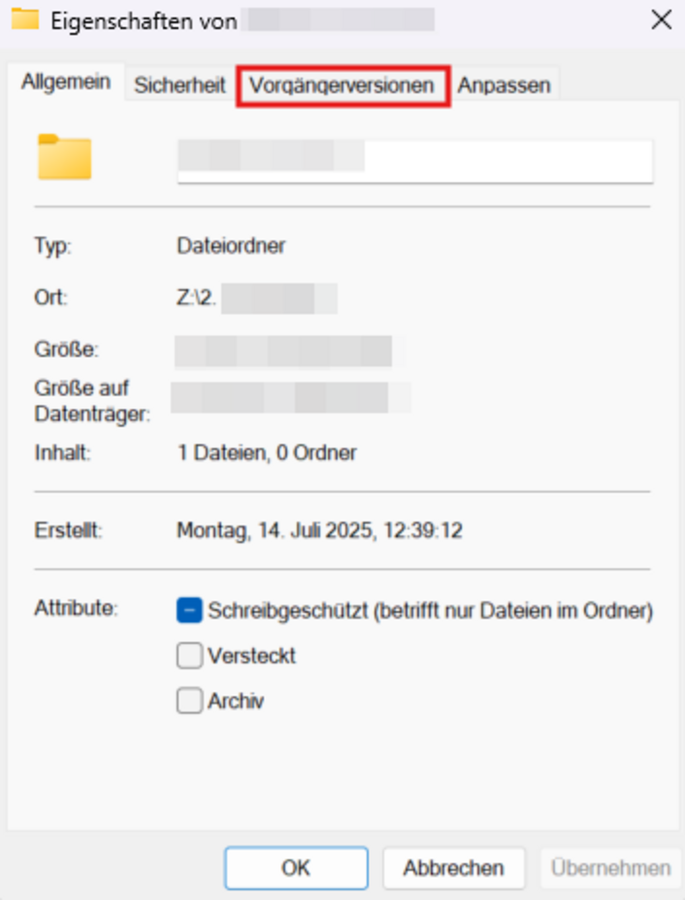
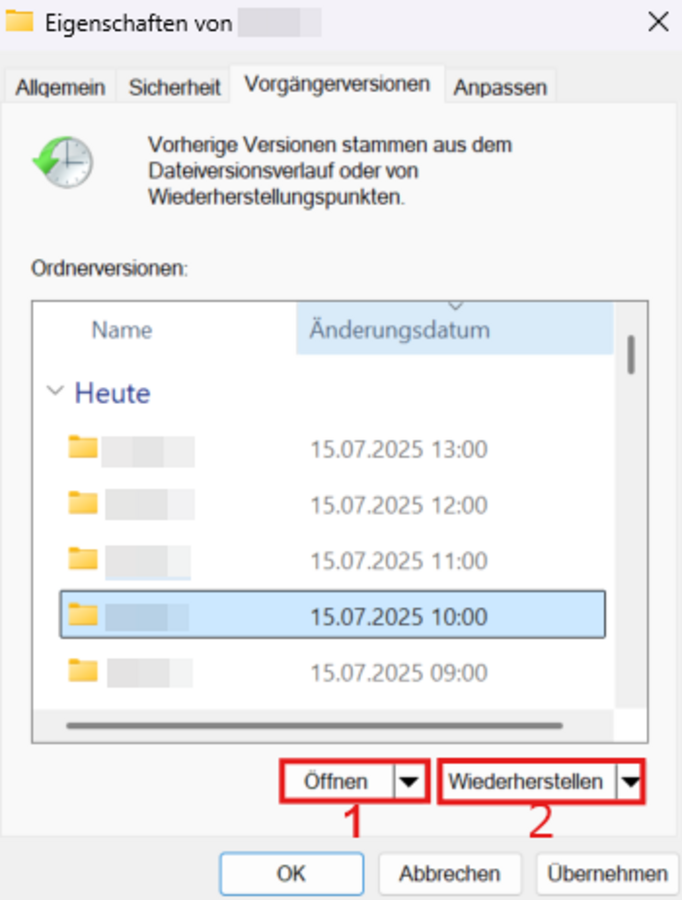
Step 3: In the "Previous versions" tab, you can select from the existing backups of the folder. After making the appropriate selection, you have the option of opening a previous version of the folder by clicking on "Open" (marker no. 1 in the following illustration) or restoring the entire folder to the selected point in time by clicking on "Restore" (marker no. 2).