Setting up Outlook
Setting up Outlook
Using groupware with Windows PCs
If you log on to your PC by entering a user ID in the format abcd1234, your PC is a member of the w2kroot Windows domain.
In this case, your PC has probably been set up by the IT-Dienste or a local IT administrator and you do not need to change any further settings.
The first time you open Outlook, your user data is automatically entered in Outlook and connected to the inbox of the user account you used to log on to your PC.
If you use more than one email account or work outside the w2kroot Windows domain or the campus network, please follow the instructions for the various Outlook versions:
Windows Outlook 2013
Set up Outlook 2013
The following is a step-by-step explanation of how to set up an email account under Outlook 2013.
Please note that this procedure is only possible for students of Oldenburg University if you have agreed to use the calendar. For more details, please see Activating the synchronisation of Stud.IP into the groupware calendar of Exchange.
Step 1 - Set up account automatically
If Outlook 2013 has not yet been used, it starts with the dialogue for setting up a new account. This dialogue can also be called up via the menu item File under Add Account. Here the first option E-mail account is already selected. The fields below are to be filled in accordingly.
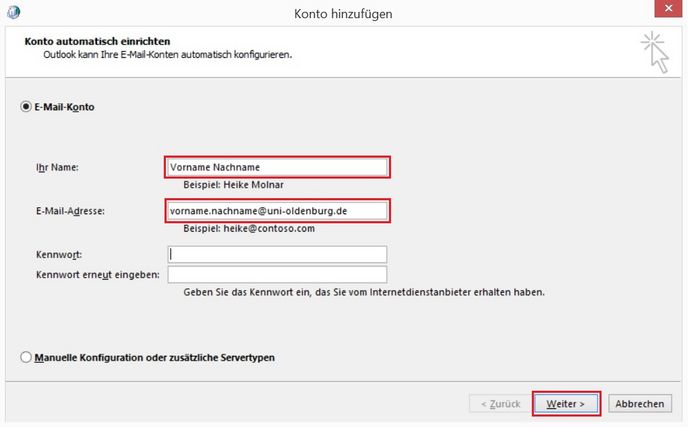 Please enter your e-mail address for setting up the account with the mail domain @uni-oldenburg.de.
If necessary, you must agree to the automatic recognition of the settings in a separate dialogue.
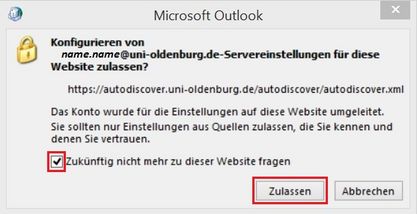
Step 2 - Configuration
If the workstation PC is not a member of the Windows domain w2kroot or you are working outside the university network, Outlook 2013 displays the following login window:
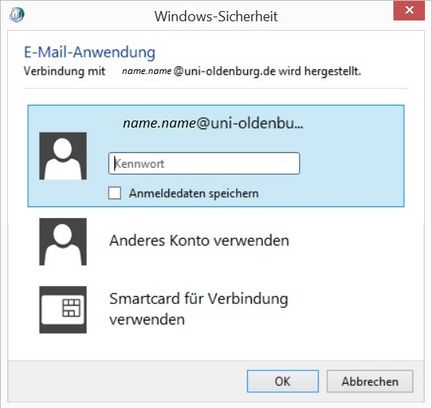
You must select the second option Use other account...
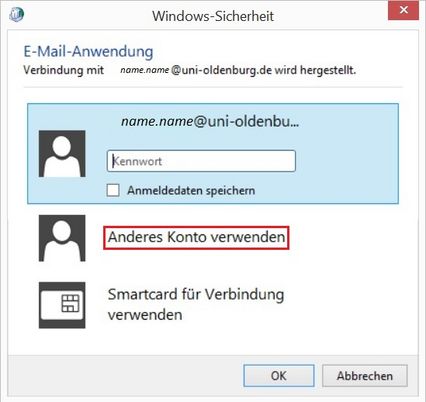
...and enter your user ID in the format w2kroot\abcd1234 with the corresponding password.
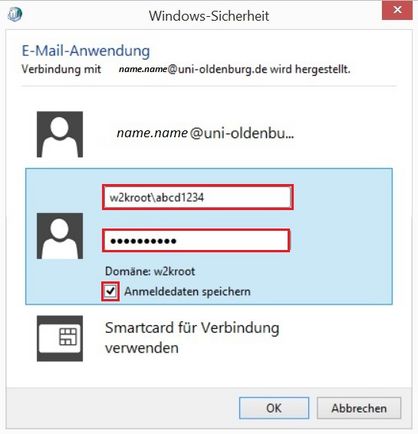 Outlook 2013 has now successfully determined the settings. The setup is now complete.
Windows Outlook 2016
Set up Outlook 2016
The following is a step-by-step explanation of how to set up an email account under Outlook 2016.
Please note that this procedure is only possible for students of Oldenburg University if you have agreed to use the calendar. For more details, please see Activating the synchronisation of Stud.IP into the groupware calendar of Exchange.
Step 1 - Set up account automatically
If Outlook 2016 has not yet been used, it starts with the dialogue for setting up a new account. This dialogue can also be called up via the menu item File under Add Account. The first option E-mail account is already selected here. The fields below are to be filled in accordingly.
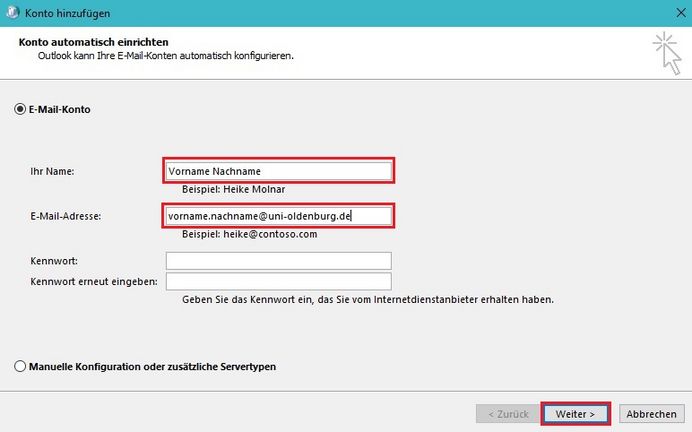
Please enter your e-mail address for setting up the account with the mail domain @uni-oldenburg.de.
If necessary, you must agree to the automatic recognition of the settings in a separate dialogue.

Step 2 - Configuration
If the workstation PC is not a member of the Windows domain w2kroot or you are working outside the university network, Outlook 2016 displays the following login window:

Under the selection More options you have to select the second option Use other account...
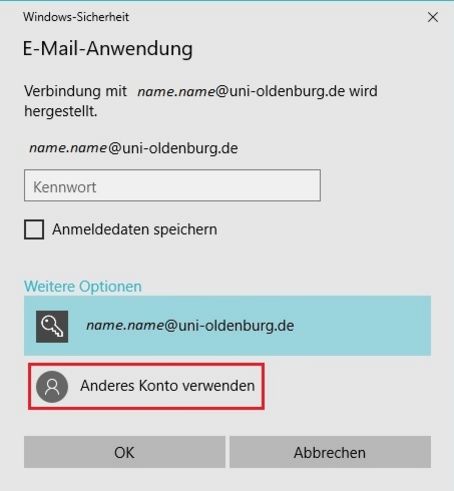
...and enter your user ID in the format w2kroot\abcd1234 with the corresponding password.
 Confirm the entry by clicking OK.
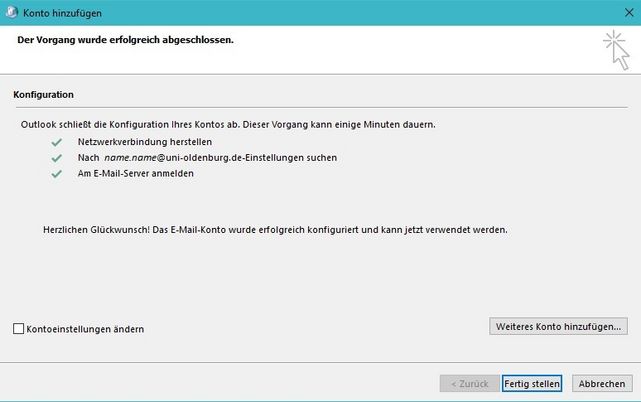
Outlook 2016 will inform you when the settings have been successfully configured. The setup is now complete.
Outlook for Mac 2011
Setting up Outlook for Mac 2011
Below is a step-by-step guide to setting up Outlook 2011 on an Apple Mac OS X.
Please note: Students of the University of Oldenburg can only to set up this function after having agreed to use the calendar. For more information, please see „Aktivierung der Synchronisation von Stud.IP in den Groupware-Kalender von Exchange” (Activating Stud.IP synchronisation with the Exchange Calendar).

