Calendar
Calendar
A powerful calendar module called Calendarize is installed for recording and displaying events and other appointments. This special module offers a number of advantages over manually generated event information.
Some advantages of a "real" calendar
- Appointments are automatically sorted chronologically.
- Past events automatically disappear from the current event list, but can still be displayed in an additional archive view if required.
- Individual events can consist of several dates (e.g. series of lectures, seminars lasting several days or other recurring dates). The title, description, location etc. then only need to be entered once and can be assigned to several event periods.
- Organisers (= contact details or addresses) and venues (= addresses) can be entered separately and then conveniently assigned to the individual events without having to re-enter them each time. It is also possible to assign several venues or organisers to an event at the same time.
- In addition to original calendar entries, normal websites or news items can also be used as information carriers for individual events. These can be calendarised, i.e. provided with corresponding date options. In this way, what appears as a calendar entry can be structured completely freely and is not tied to a rigid scheme.
- Calendar entries can be managed centrally and displayed on various websites. By assigning categories, it is possible to ensure that certain events are only displayed in certain places. Views filtered by category can thus be generated from an overall pool of events.
- An ICS file is automatically offered for download for each event. This is a systematic calendar file that can be imported into Outlook or your own smartphone calendar at the touch of a button. This makes it very easy to import appointments into your own calendar.
Video of the training on the calendar module
The functionality of the calendar was presented and demonstrated in an online training session on the calendar module. You can watch the video here. (Note: Unfortunately there are short sound problems in some places).
- Introduction to the topic (0'00")
- First steps: Creating an appointment pool and generating a first appointment (6'26")
- Centrally offered exclusion dates, e.g. public holidays (19'31")
- Turning an appointment into a series by repeating it (25'35")
- Display the appointments on the website (30'26")
- Show a detailed view of the appointments on your own website (37'12")
- Normal appointment maintenance after the start has been made (44'12")
- Change the appearance of the display, e.g. by hiding certain features (48'40")
- Add the "All appointments" button if the scrolling look is not enough (55'34")
- Remove certain dates or periods from a series of dates, e.g. lecture-free period (60'49")
- Categorise appointments to enable filtered outputs based on this (72'35")
- Also offer events in English (73'37")
- Calendarise normal websites, i.e. display them as calendar events (82'40")
Note: The video is only accessible to members of the university.
Video: Show dates of calendared pages /Subscription restriction in forms

In an online training course, the options for displaying the dates of calendarised pages were shown, as well as the use of these dates in registration forms. The new option of limiting permitted form submissions to a set maximum number was also demonstrated.
- Introduction to the topic (0'00")
- Calendarising a website (e.g. an event) (2'49")
- Automatically display calendar appointments of a page online in the page (7'39")
- Variant: Appointment list with clock symbol instead of dash (11'05")
- Past appointments are also listed (11'43")
- Create online form (13'11")
- Create selection field with answer options for which there should be a registration limit (16'19")
- General registration limit (maximum number of form submissions) (19'04")
- Limit the maximum number of individual response options instead of the total number of form submissions (22'11")
- Use dates from the calendarised page as response options in the form (25'21")
Note: The video can only be viewed by members of the university.
Set up a calendar
Setting up a calendar consists of several steps. The first step is the basic configuration, which is always required. Later, the functionality and appearance can be configured more specifically.
Create an appointment pool
Calendar appointments are not tied to a single website, but can also be displayed on different websites. Appointment management is therefore independent of where the appointments are to be displayed later.
- You create a system folder as a storage location for the appointments of an individual organisation, which can be created in a similar way to a normal standard page. It makes sense to give the folder a meaningful name, e.g. "Termine Institut Physik" or similar. - This name is only visible internally and allows you to quickly identify the appointment location by name.
- After clicking on the newly created folder, a first appointment is created in it. (This is important so that the appointment pool is recognised as such by the Calendarize view). To do this, you can click on the blue "Go to list module" button. Use the plus symbol, which is located in the light grey area at the top of the list view directly below the black TYPO3 header bar, to create a new element and select Calendarize - Event Management → Event. A new window opens.
- First enter a title there. Then switch to the"Date options" tab and click on "Create new" under "Calendarise". All you need to do here is click once in the white field under "Start date" so that the current date appears there. You can then click "Save and close" at the top to provisionally finalise the entry. - The appointment pool is now ready.
Insert an appointment overview in a website to display the appointments
Create calendar element with basic configuration
While an appointment pool is, so to speak, a neutral place where calendar appointments are managed, a specific decision is made within the websites as to where these appointments should be displayed. To do this, a corresponding calendar content element must be inserted and configured in the respective website.
- Create an element of the "Calendar" type on the page (in the Plug-ins tab) and switch to the "Plug-in" tab → "General configuration" sub-tab (initially highlighted in red as this is a mandatory setting)
- Tick the "Event" item under "Configuration (data type)
- Further down under "Starting point", click on the folder symbol on the far right and select the previously created event pool. This is now the data source for the appointments to be displayed.
- Click on "Save" at the top to save the calendar content element.
⇒ From now on, something should already be visible on the website!
Edit appointments
The above steps have created a minimal basic structure so that events can be displayed on the website at all. The following section deals with the specific setting options for maintaining events.
Basics: The Calendarise view
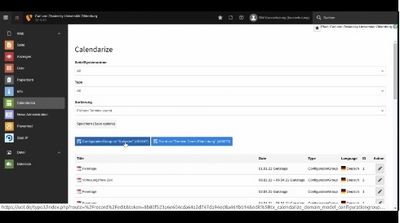
In the left-hand function column of TYPO3 there is the entry Web→Calendarize. This view is divided into three parts:
- Setting options for filtering and sorting
- Blue buttons for creating new appointments in a respective appointment pool
- List of existing calendar appointments.
Appointments can be created, edited and deleted here. A distinction must be made here between events and appointments.
Events vs. appointments
Each event can consist of one or more appointments. For example, a training seminar can take place on several days, but it is still an event with a description text. This event then includes several dates. This also applies to office hours that take place regularly in the same way - a new event does not have to be created for each appointment.
All existing appointments are listed in the Calendarise view, i.e. several appointments for recurring events. If you click on one of these appointments, you will be taken to the editing screen for the corresponding event where you can edit the event as such as well as all associated appointments.
Configuring the Calendarise view
The appointment list can be filtered and sorted. It can be sorted chronologically in ascending or descending order. Filtering can be based on entry type and storage location.
- Page/system folder: If you have access to several appointment pools, all appointments from all pools are listed at the bottom of the appointment list. However, if you only want to see the appointments from a single appointment pool, select the desired appointment pool here.
Additional note: It is not important which page is clicked in the page tree, as the Calendarize view always shows all appointments to which you have access. The restriction to only one appointment pool is then made here under Page/System folder. - Type: There are different entry types. In addition to "normal" calendar entries(events), these can also be pages, news items or appointment groups. If there are many entries, this selection can possibly increase the overview.
- Sorting: The order is always chronological. However, you can choose whether the earlier or later events should be displayed first. (In particular, if there are also many past appointments that may still be displayed in an archive, it is advisable to display the later appointments first ).
After you have changed these settings, save them using the Save button. TYPO3 then remembers these settings permanently.
Create a new event / open existing events for editing
Create new event
The blue buttons show the date pools to which you have access.
⇒ Now click on the button for the date pool in which you want to create a new event.
Edit an existing event
Existing events are listed below. Click on the title of an event or at the very end on the corresponding pencil icon to edit the event in question.
Edit event: Text information
An event initially has these important text fields:
- Title: This is displayed as a heading both in overview lists and in the detailed view.
- Summary: This short text is displayed in overview lists in addition to the title, but not in the detailed view.
- Description: This field contains the full description text of the event and is only displayed in the detailed view. The field can contain formatted text, links etc.
The details of organisers and venues are entered in separate fields below:
- Venue from addresses: An address data record that has been generated separately can be selected here. The advantage of this is that much more specific data can be entered here. In addition, several venues can also be selected here and can then be clicked on separately!
- Alternatively: Venue: Pure text description of the venue together with venue link (this allows the venue to be made clickable in order to link to a site plan or similar)
- Organiser from addresses or alternatively organiser and organiser link: Works identically to the event location
Note: Organisers and venues are both address data records, but an institution or person is entered in one and a building or room in the other.
Edit event: Date information
The special features of the Calendarize module begin with the date information. The date information is edited in the "Date options" tab.
Basic understanding: Dealing with different types of appointments
In principle, an event can consist of one or more dates. Anything that does not take place as one continuous period is therefore several dates. A few examples:
- Concert, lecture or similar: This is usually an event with a start time and a fixed or open end
- Workshop over several days: The workshop could, for example, start on Thursday morning and end on Friday evening. Strictly speaking, there are then two dates, possibly with different start or end times, as there is a break at night. For reasons of clarity, it may nevertheless make sense to make one appointment with different start and end dates - this is a matter of judgement.
- Regular office hours or similar: In terms of content, this is a recurring appointment, i.e. an event that takes place in the same way, e.g. weekly or fortnightly. Only one event needs to be created for this, to which several dates are then assigned.
- Series of lectures, colloquium or similar: This may also be a regularly recurring event, but the content differs from time to time. In this case, a separate event must be created for each date so that the summary and description can be entered individually.
Define appointment times: Basic settings
Click on the "Create new" button in the "Date options" tab of the event to create a new date entry for the event. The input fields for the date and time of the event will then appear, divided into several segments:
- Basic: These fields initially remain unchanged as they are only required for special conditions. However, the "Status" field is interesting: If an event that has already been planned is cancelled at short notice, it can be set to "cancelled" here. It does not simply disappear from the calendar, but remains visible with the appropriate labelling!
- Date and duration: The start date is of course essential. The end date is only required if it differs from the start date (event lasting several days that is to be displayed as one continuous date). As an alternative to a specific date, the end date can be defined dynamically in the third field, e.g. "End of the month".
- Time: The start time is usually decisive here (except for all-day events), so it should not be left at "00:00"! The end time can either be set specifically or explicitly marked as"open". If, on the other hand, the All-day switch is activated, the times remain hidden in the public display.
Once this information has been entered in full and there is no longer a red warning due to missing information, you can click on "Save" at the top.
⇒ The appointment should then be listed at the bottom as an upcoming event.
Define appointment times: Multiple appointments and repetitions
It gets exciting when the event consists of several dates. If the text information of the event always remains identical, you can now simply add further dates to the event. However, if the description also changes from date to date (e.g. for a colloquium), a new event is created for each date.
There are two types of repetitions:
1. each date of the event is entered independently
This allows you to freely enter the date and time of each event date. After saving an appointment, simply click on the "Create new" button again.
2. a recurrence logic is defined for an existing event (e.g. weekly)
If the repetitions are very regular, e.g. if an office hour always takes place on the same day and at the same time every week during the semester, the interval function, which can be found in the "Interval" tab, is a good option.
Edit event: Assign categories
If different types of events are used in different contexts and are to appear on different websites for different target groups, for example, they can be categorised so that the output can then be filtered using the categories.
If required, new categories can be defined in addition to those already available in our TYPO3 system. This can be done, for example, in a separate system folder that is created specifically as a location for the categories. New categories can then be created in the list view and subordinated to an existing category. One or more of these categories can then be assigned to the individual events in the "Categories" tab.
Create (English) translation of an event
If you also offer your websites in English, you may also want to do this with the calendar entries. Just as with websites, a calendar entry can also be given an English language version:
- Prerequisite: An English version of the appointment pool (system folder containing the appointments) must first exist. To do this, click on it in the page tree and switch to the list view. The option to create an (English) translation of the folder is then offered at the top. If necessary, please enter an English folder name here and then save it.
- Creating a language version of an event: Then switch back to the Calendarise view (green symbol in the left-hand TYPO3 column) and open an event that was previously only available in German for editing. At the top (still above the Save button) you will now find a language selection where you can create an English language version of the event.
- Edit the text fields of the language version: You can now fill the texts of the English language version with English-language content. The date options, however, cannot be changed here as they are automatically taken from the original German-language version of the event.
Alternative: Calendarise websites or news items!
This is a special function of the Calendarise module: Even normal web pages or news messages (if you use the news system) can be calendarised!
- Messages: The [Date options] tab also exists in the edit view.
- Websites: These can be changed to the page type "Event" in the [General] tab. The date options then appear a little further down in this tab.
If, for example, a normal website already exists for a certain event, which can be much more complex in terms of content than a normal calendar entry, then the calendar information can simply be assigned to this website. The date settings work in the same way as for events (as described above).
The same applies to news items: A news item can already appear as an announcement on an organisation homepage. By calendaring it, it can also be displayed in a calendar (appointment overview).
Procedure
Additional settings are required in the calendar module, which is embedded on the website for the overview list of appointments, so that pages and/or messages are also listed:
- For news, the News Event tick box must be activated as shown in the attached graphic.
- For calendarised web pages, the Calendarize Page checkbox must be activated.
- In addition, a TYPO3 page must be selected below under Starting point, below which calendarised pages are searched for.
- Tip: If possible, the pages that function as calendarised events should be located within a common parent page (e.g. "Events"). The parent page can then be selected as the starting point, and only the calendarised pages within it will be found.

Configure the schedule on the website
Appointment overviews are used to display several appointments. Traditionally, this is known as a calendar page for a week or a month. Here on the website, however, it works more dynamically. For example, you can also define that exactly the next 12 appointments should be displayed. There is also the question of appearance.
There are therefore two dimensions to the display:
- The selection of the appointments to be listed - here you set from which sources (appointment pools) the appointments should come and whether certain restrictions apply, e.g. filtering based on categories or date range (for appointment archives, for example, a past period can also be defined here)
- The appearance of the displayed appointments - here you can set how the list of appointments should look.
The selection of dates to be listed: WHAT is shown
Starting point (in the "Plug-in" tab → "General configuration" sub-tab)
At least one appointment pool (system folder containing appointments) must be selected here, from which the appointments for the listing are then taken.
Filtering by category (in the "Categories" tab)
If one or more categories are assigned to the calendar content element, this means that only those appointments are displayed that have at least one of the categories selected here.
Filtering by data types: Events, websites, news items (in the "Plug-in" tab → "Main configuration" sub-tab)
In the "Data type" list, you can tick which types of calendar entries should be displayed: Events (Event), calendarised websites and/or news (News).
For websites, it is important that a suitable starting point (see above) is defined, i.e. a higher-level page containing the calendarised pages.
(The documentation for the additional "Groups" element is still in progress).
Quantity restriction: Limit (in the "Plug-in" tab → "Main configuration" sub-tab)
The maximum number of appointments to be displayed can be set here.
Overwrite start date / Overwrite end date (in the "Plug-in" tab → "Main configuration" sub-tab)
Normally, the next appointments are automatically displayed or automatically hidden again once the appointment has been reached. However, it may be desired to display only the dates of a specific period (e.g. a past period for an event archive or a future period à la "Event programme for the year 2022".
Absolute points in time can be defined as the start or end date (e.g. 1 January at 0:00 and 31 December at 23:59 for a specific year) or relative periods (e.g. "- 20 years" and "now" for the entire past 20 years - to do this, first set the "Use relative date" switch).
The look of the schedule overview: HOW it is displayed
Aesthetics of the calendar overview
By default, the calendar entries in the overview appear as a horizontally scrollable element on the website. Depending on the application, however, a different form of presentation may be desired. Here are a few keywords for the configuration options:
- Instead of a dynamic scrolling look, a static two-column display can also be selected. The appointments are stacked one below the other and are therefore also visible without scrolling.
- You can differentiate within the static display, so you can also select a compact display that requires less space.
- Certain elements within the listed appointments can be hidden, e.g. the text (from the "Summary" field), the "more" button or (if available) the categories of the appointment. This results in an even more compact display.
Customise the appearance of the appointment list
The static two-column look is activated by entering the following in the [Advanced] tab of the calendar content element in the CSS class for content element the character string kal-archiv.
This look can be changed even further by entering additional information (separated by spaces) in the field:
kal-compactresults in an even more compact display, in which the time information appears on the left and the content text on the right. The font size of the event title is reduced slightly.kal-ohnemehrhides the more buttonkal-ohnetexthides the description text so that only the title remainskal-ohnekatshides the categories (if any are assigned to the event entry)kal-ohnezeithides the time information
Sorting (in the "Plug-in" tab → "General configuration" sub-tab)
The order of the appointments can be chronologically ascending. Typical applications:
- ASC (ASCending = ascending): In a "normal" calendar , the earlier appointments are displayed first. Those further in the future are then displayed further back.
- DESC (DESCending = descending): With a calendar archive, it may be desirable to display the later appointments first. Dates that are further in the past are then displayed further back, while the recently expired dates are displayed at the front.
Hide pagination and teaser (in the "Plug-in" tab → "Main configuration" sub-tab)
For a longer appointment list (e.g. an appointment archive spanning several years), pagination enables page-by-page scrolling. Only a limited number of appointments are then displayed. This pagination function can be deactivated.
Calendarised pages: Automatically display dates of a page in its page content
As mentioned above, individual web pages can be assigned calendar dates directly and then automatically listed in date overviews.
It would now be helpful if the dates assigned to the page were also automatically displayed in the page in a readable format so that they do not have to be maintained manually in the text content of the page in addition to the date options.
Note: The procedure is demonstrated in the training video above
Real-time filtering of the listed events by category
If required, real-time filtering based on the category of events can be activated in the form of buttons located above the event list to display only the events in the announced category.
An example of such a solution can be viewed here:
Please contact me if you have any questions.
Use website dates as response options in the registration form
Imagine this situation:
- An information event always takes place identically, and dates are always offered for it.
- The website for the event contains a registration form which can be used to register for participation.
- The form should now automatically offer all future dates already planned for selection, from which you can then choose a date.
Note: The procedure for achieving this is explained in the training video above.